
The Cookie That Tastes Like a Cozy Holiday Hug: Chocolate Peppermint Cookies
Hello, my friends, and welcome back to the kitchen! Can you smell that? It’s officially that time of year—the air is crisp, the twinkle lights are going up, and my oven is permanently preheating to 350°F. There’s something magical about holiday baking, isn’t there? It’s not just about the treats themselves; it’s about the warmth that fills your home, the joy of sharing a plate with neighbors, and the simple, sweet act of creating something with your own two hands. If you’re looking for a recipe that embodies all that cozy, festive spirit, you’ve found it.
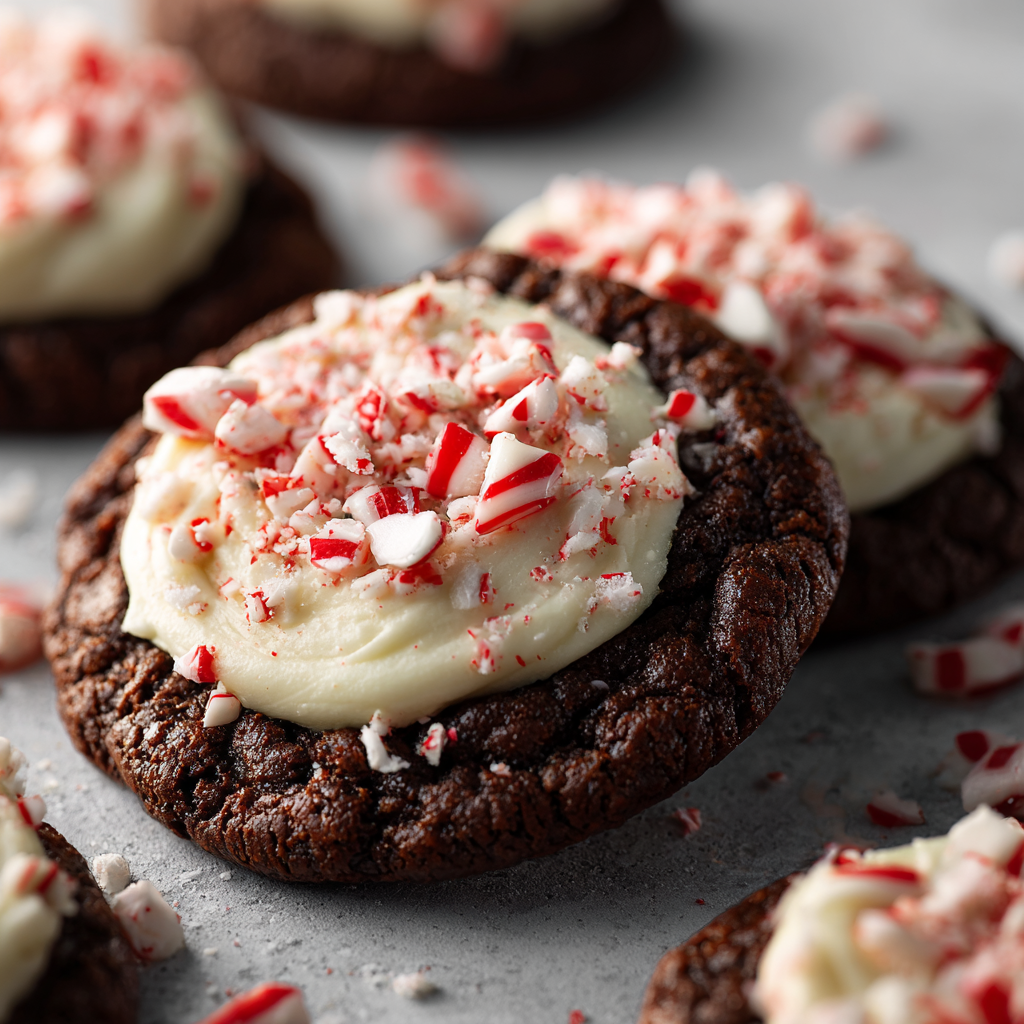
Today, we’re making my absolute favorite holiday cookie: Chocolate Peppermint Cookies. Imagine this: a deeply rich, almost brownie-like chocolate cookie that’s soft and fudgy in the center. It’s topped with a cloud of impossibly creamy peppermint frosting that’s cool and sweet without being overwhelming. And the grand finale? A cheerful crunch of crushed candy canes on top. It’s a symphony of textures and flavors—warm chocolate, cool peppermint, creamy, crunchy—that just sings of the holidays. This isn’t just a cookie; it’s an experience. And the best part? They’re surprisingly simple to make. So, tie on your favorite apron (the messy one with the stains of recipes past!), and let’s bake some memories together.
A Snowy Day & My Grandma’s Apron
This recipe always takes me right back to my grandma’s kitchen. I must have been about ten years old, and a huge snowstorm had cancelled school for the day. The world outside was a silent, white blanket, and inside, my grandma decided it was the perfect day for a baking project. She pulled out her old, wire-bound recipe box, her hands flour-dusted and capable, and let me choose what we’d make. I pointed to a recipe card simply titled “Chocolate Peppermint Dreams.”
I remember standing on a stool, carefully measuring the cocoa powder, making a huge mess but feeling like a world-class chef. She showed me how to test if the butter was properly “creamed,” letting me dip a finger in the sweet, fluffy mixture. The smell of chocolate and peppermint filling that warm kitchen is a core memory for me. When we finally iced the cooled cookies and sprinkled on the crushed candy canes, she let me have the first one. That first bite—the cool, creamy frosting against the rich, warm cookie—was pure magic. We packed most of them into tins to give to the neighbors, and that feeling of sharing something we made together was even sweeter than the cookies themselves. Every time I bake these now, I think of her, that snowy day, and the simple, powerful joy of sharing food made with love.
Gathering Your Cookie Crew: The Ingredients
Here’s everything you’ll need to create this winter wonderland in cookie form. Don’t be intimidated by the list—a lot of these are pantry staples, and I’ve included all my best tips and swaps to make it work for you!
For the Chocolate Cookie Dough:
- 2 cups unsalted butter, softened – Using unsalted lets you control the salt level. If you only have salted butter, that’s okay! Just omit the extra ½ tsp of salt later. Chef’s Insight: “Softened” means your finger should leave a slight indent. Don’t melt it! We want to cream it for a light texture.
- 1½ cups packed brown sugar – This adds a wonderful molasses-y moisture and chewiness to the cookies.
- ⅔ cup white granulated sugar – The white sugar helps the cookies spread slightly and gives them a crispier edge.
- 2 large eggs – Always best at room temperature! They incorporate into the butter and sugar much more smoothly.
- 4 tsp vanilla extract – Yes, four teaspoons! It seems like a lot, but trust me, it helps balance the deep chocolate flavor.
- 2 tbsp molasses (optional but highly recommended) – This is my secret weapon for depth of flavor. It makes the chocolate taste richer and more complex.
- 2 tbsp corn syrup (optional) – Another pro tip! A tiny bit of corn syrup keeps the cookies soft and fudgy for days. You won’t taste it, I promise.
- 3–3½ cups all-purpose flour – We’ll start with 3 cups and add more if needed. The dough should be slightly tacky but not sticky.
- 2 tsp baking soda – Our leavening agent for that perfect rise.
- 1 tsp baking powder – A little extra help for a nice, cakey texture.
- ½ tsp salt – Crucial! Salt makes all the other flavors pop. Omit if using salted butter.
- 1⅓ cups unsweetened cocoa powder – Use a good quality one! This is the star of the show, so make it count.
- 4 tsp espresso powder (optional but amazing) – Don’t worry, your cookies won’t taste like coffee! Espresso powder is a magic ingredient that magnifies the chocolate flavor, making it taste even more chocolaty.
For the Peppermint Frosting:
- 1 cup butter, softened – For the frosting, we want it nice and soft to get that creamy, dreamy texture.
- ½ cup shortening – This helps stabilize the frosting and keeps it from melting too easily. If you’re not a fan, you can substitute an additional ½ cup of butter, just know the frosting might be a bit softer.
- 6 cups powdered sugar – Also called confectioner’s sugar. We’ll sift it to avoid any lumps!
- 8 tbsp heavy cream – Heavy cream (or whipping cream) gives the frosting its luxurious, rich texture. You can use milk, but you’ll likely need less (start with 4 tbsp).
- 1 tsp vanilla extract – A flavor base for the frosting.
- 1 tsp peppermint extract – Start here! You can add a tiny bit more if you love a strong peppermint kick, but be careful—it’s potent stuff.
For the Topping:
- 2–3 crushed candy canes or peppermint candies – The festive crunch! Unwrap them and place them in a zip-top bag, then crush with a rolling pin. So therapeutic!
- Optional twists: A drizzle of melted white chocolate, a sprinkle of mini chocolate chips, or even a light dusting of extra cocoa powder for a pretty finish.
Let’s Get Baking: Step-by-Step Instructions
Okay, team! Let’s turn these ingredients into something spectacular. Read through all the steps first—it’s like reading the map before a road trip!
Step 1: Preheat and Prep. First things first, preheat your oven to 350°F (175°C). This gives it plenty of time to reach a steady, even temperature. Line your baking sheets with parchment paper or silicone baking mats. This prevents sticking and makes cleanup a dream. Chef’s Hack: If you don’t have either, you can grease the pans, but parchment paper is the MVP for perfect cookie bottoms.
Step 2: Cream the Butter & Sugars. In a large bowl of a stand mixer fitted with the paddle attachment (or using a hand mixer), beat the softened butter, brown sugar, and white sugar together on medium-high speed. We’re not just mixing them; we’re “creaming” them. Do this for a good 2-3 minutes, until the mixture becomes light in color and fluffy. This step incorporates air, which is key for a great texture. Scrape down the sides of the bowl with a spatula to ensure everything is mixed evenly.
Step 3: Add the Wet Ingredients. Reduce the mixer speed to medium and add the eggs one at a time, beating well after each addition. Now, add the vanilla extract, molasses, and corn syrup (if using). Mix until everything is beautifully combined and smooth. It might look a little curdled at first if your eggs were cold, but it will come together—promise!
Step 4: Whisk the Dry Ingredients. In a separate, large bowl, whisk together 3 cups of the flour, cocoa powder, espresso powder, baking soda, baking powder, and salt. Whisking is important here! It ensures all the leavening agents and cocoa are evenly distributed so you don’t get a bitter bite of baking soda in one cookie. Chef’s Hack: Sift your cocoa powder if it’s particularly lumpy for an ultra-smooth dough.
Step 5: Combine Wet & Dry. With the mixer on low speed, gradually add the dry ingredients to the wet ingredients. Mix until just combined. Please, I beg you, don’t overmix! Overmixing develops gluten and can lead to tough cookies. If the dough seems too sticky, you can add the remaining ¼ cup of flour, a tablespoon at a time. The dough will be thick and fudgy.
Step 6: Scoop & Slightly Flatten. Using a medium cookie scoop (about 1.5 tablespoons of dough), portion out the dough onto your prepared baking sheets, leaving about 2 inches between each cookie for spreading. Gently flatten each dough ball slightly with the palm of your hand. This helps them bake into a perfect cookie shape instead of staying too domed.
Step 7: Bake to Perfection. Bake for 9-11 minutes. The cookies will still look soft in the center, but the edges will be set. They will continue to cook on the hot baking sheet after you take them out. This is the secret to a fudgy center! Chef’s Hack: For perfectly round cookies, immediately after taking them out of the oven, take a round cookie cutter or a glass slightly larger than the cookie and swirl it around the cookie to “scoot” it into a perfect circle. Let them cool on the baking sheet for 5 minutes before transferring them to a wire rack to cool completely. They must be completely cool before frosting!
Step 8: Whip Up the Frosting. While the cookies cool, make the frosting. In a clean mixer bowl, beat the softened butter and shortening together until smooth and creamy. Gradually add the sifted powdered sugar, one cup at a time, on low speed (unless you want a powdered sugar snowstorm in your kitchen!). Once incorporated, add the heavy cream, vanilla, and peppermint extract. Increase the speed to medium-high and beat for 2-3 minutes until the frosting is light, fluffy, and wonderfully spreadable.
Step 9: Assemble the Magic! Once the cookies are completely cool, use a butter knife or an offset spatula to spread a generous dollop of frosting onto each cookie. Immediately sprinkle with the crushed candy canes so they stick. If you’re adding a drizzle, do that after the frosting has set a little.
How to Serve These Holiday Stars
Presentation is part of the fun! I love arranging these cookies on a large rustic wooden board or a festive holiday platter. Stack them high for a casual, abundant feel. For a more elegant touch, place each cookie in a mini cupcake liner before arranging them on a tiered stand. They pair beautifully with a glass of cold milk for the kids, a hot cup of coffee for the adults, or even a mug of rich hot chocolate for the ultimate chocolate-peppermint experience. These cookies are the star of any cookie swap, holiday party, or cozy night by the fire.
Get Creative: Recipe Variations
Feel free to make this recipe your own! Here are a few fun twists:
- Chocolate Mint Sandwich Cookies: Skip the frosting and crushed candy. Instead, spread frosting between two cooled cookies to create a decadent sandwich.
- Gluten-Free Swap: Use a 1:1 gluten-free all-purpose flour blend in place of the regular flour. I recommend one that includes xanthan gum.
- Dairy-Free Delight: Use plant-based butter and milk. For the frosting, use dairy-free butter and coconut cream instead of heavy cream.
- Dark Chocolate Lover: Use dark cocoa powder instead of regular unsweetened cocoa for an even deeper, more intense chocolate flavor.
- Peppermint Bark Cookie: After frosting, drizzle with melted dark chocolate instead of (or in addition to) the white chocolate.
Chef’s Notes: From My Kitchen to Yours
This recipe has evolved so much since that first snowy day with my grandma. I’ve tweaked it over countless holiday seasons, adding the espresso powder and molasses along the way to really make the chocolate flavor sing. One of my favorite kitchen fails was the year I was chatting with a friend and completely forgot to add the sugar to the frosting. I ended up with a bowl of… well, sweetened butter. We laughed so hard, and I had to start all over again! It’s a good reminder that even in the kitchen, it’s the mistakes and the laughter that make the best memories. These cookies freeze beautifully, too. I often make a double batch, freeze the baked (unfrosted) cookies, and then frost them the day I need them. It makes hectic holiday hosting so much easier!
Your Questions, Answered: FAQs & Troubleshooting
Q: My cookies spread too much and turned out flat. What happened?
A: This is usually caused by butter that is too warm or melted. Make sure your butter is just softened, not melted. Also, ensure your baking soda and powder are fresh, as old leavening agents lose their potency. Chilling the dough for 30 minutes can also help prevent overspreading if your kitchen is very warm.
Q: My frosting is too runny/thick. How can I fix it?
A: Frosting is easy to adjust! If it’s too runny, gradually beat in a little more sifted powdered sugar, a quarter cup at a time. If it’s too thick and difficult to spread, beat in a teaspoon of heavy cream or milk at a time until it reaches your desired consistency.
Q: Can I make the cookie dough ahead of time?
A: Absolutely! You can scoop the dough into balls, place them on a baking sheet, and freeze them solid. Then, transfer the frozen dough balls to a zip-top bag. You can bake them straight from the freezer; just add 1-2 minutes to the baking time.
Q: The peppermint extract taste is too strong. How can I tone it down?
A: Peppermint extract can vary in strength by brand. Always start with the recommended 1 tsp and then taste. If it’s already too strong for you, you can try to balance it by beating in a little more powdered sugar and butter to dilute it, but it’s tricky. Next time, start with ½ tsp and add from there!

Chocolate Peppermint Cookies
- Total Time: ~45 mins
Description
These cookies are everything the holidays should be—rich, fudgy chocolate, cool peppermint frosting, and a cheerful crunch of candy canes on top. They’re soft in the center, slightly crisp at the edges, and bursting with festive flavor. Perfect for cookie swaps, snowy afternoons, or simply sharing with someone you love.
Ingredients
For the Cookies:
-
2 cups unsalted butter, softened
-
1½ cups brown sugar, packed
-
⅔ cup white sugar
-
2 large eggs, room temperature
-
4 tsp vanilla extract
-
2 tbsp molasses (optional, deepens flavor)
-
2 tbsp corn syrup (optional, keeps cookies soft)
-
3–3½ cups all-purpose flour
-
1⅓ cups unsweetened cocoa powder
-
4 tsp espresso powder (optional, enhances chocolate)
-
2 tsp baking soda
-
1 tsp baking powder
-
½ tsp salt
For the Frosting:
-
1 cup butter, softened
-
½ cup shortening (or butter)
-
6 cups powdered sugar, sifted
-
8 tbsp heavy cream (or milk, less)
-
1 tsp vanilla extract
-
1 tsp peppermint extract
Topping:
-
2–3 candy canes, crushed
-
Optional: melted white or dark chocolate drizzle
Instructions
-
Prep – Preheat oven to 350°F (175°C). Line baking sheets with parchment.
-
Cream Butter & Sugars – Beat butter + sugars until light and fluffy (2–3 min).
-
Add Wet – Mix in eggs, vanilla, molasses, and corn syrup until smooth.
-
Dry Mix – Whisk flour, cocoa, espresso, baking soda, baking powder, and salt.
-
Combine – Slowly add dry mix to wet, mixing just until combined. Dough should be thick.
-
Scoop & Bake – Scoop 1.5 tbsp dough balls, flatten slightly. Bake 9–11 min, edges set, centers soft. Cool completely.
-
Frosting – Beat butter + shortening until creamy. Add powdered sugar gradually. Mix in cream, vanilla, and peppermint extract. Whip until fluffy.
-
Decorate – Spread frosting on cooled cookies, top with crushed candy canes. Add drizzle if desired.
- Prep Time: 25 mins
- Cook Time: 10 mins/batch
Nutritional Information (Approximate, per Frosted Cookie)
Calories: ~300 | Fat: ~16g | Saturated Fat: ~10g | Carbohydrates: ~35g | Sugar: ~25g | Protein: ~2g | Sodium:
Final Thoughts: A Batch of Love to Share
And there you have it, my friends. A cookie that’s so much more than just a sweet treat. It’s a warm, chocolatey hug, a blast of cool, festive peppermint, and a symphony of happy crunch—all rolled into one perfect bite.
But more than that, this recipe is a reminder. A reminder to slow down and savor the sweet, simple moments this season. To embrace the beautiful mess of flour on the counter, the laughter shared over a bowl of frosting, and the profound joy of handing someone a gift made with your own hands.
Whether you’re baking these to continue a beloved family tradition or to start a new one of your own, I hope these Chocolate Peppermint Cookies fill your kitchen with the same warmth and magic that they’ve brought to mine for so many years. So from my kitchen to yours, happy baking, happy sharing, and happy holidays.


