

Welcome to My Kitchen: Let’s Make Some Magic!
Hello, my fellow flavor-seeker! Can you smell that? It’s the unmistakable, soul-warming aroma of melted chocolate and rich peanut butter wafting through the air. It’s a smell that instantly transports me back to my grandmother’s kitchen, a place of flour-dusted counters and endless laughter. If you’re anything like me, you believe some of the best memories are made right next to the mixing bowl, and today, we’re creating a classic that’s bursting with nostalgia and joy.
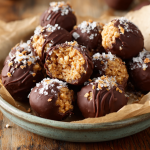
We’re whipping up a batch of Peanut Butter Balls with Rice Krispies. Oh, you know the ones! That perfect, no-bake treat that combines creamy, crunchy, and sweet into one irresistible, bite-sized piece of heaven. They’re the star of every holiday cookie tin, the secret weapon for last-minute potlucks, and the ultimate reward for a job well done (even if that job was just making it through a Tuesday).
The best part? You absolutely do not need to be a pastry chef to master these. This recipe is all about heart, a little bit of mess, and a whole lot of fun. So, tie on your favorite apron (the one with the questionable stains that tell a thousand stories), grab a big bowl, and let’s create something unforgettable together. Get ready to make your kitchen the coziest, most delicious place in the house!
A Christmas Eve Tradition: The Great Peanut Butter Ball Roll-Off
I can’t talk about these peanut butter balls without thinking of my family’s Christmas Eve tradition. After the dinner dishes were cleared, my mom would clear the massive wooden table and lay out sheets of wax paper. The big metal mixing bowl, the one that seemed impossibly huge to my child-sized hands, would emerge, filled with that glorious peanut butter mixture.
My sister and I would be tasked with rolling the balls. But it was never just a task; it was a full-blown competition. The “Great Roll-Off,” we called it. Who could roll the most perfect, most spherical balls? Who could do it the fastest without getting peanut butter in their hair? (Spoiler: we both always did). We’d have powdered sugar dust on our noses and the radio tuned to cheesy holiday music. It was messy, it was chaotic, and it was pure magic. To this day, the taste of one of these treats isn’t just a taste—it’s a time machine straight back to that table, surrounded by love, laughter, and the excited anticipation of Christmas morning.
Gathering Your Ingredients: A Little Chef’s Insight
Part of the beauty of this recipe is its simplicity. You likely have most of these ingredients in your pantry right now! Here’s what you’ll need and why each one plays a crucial role:
- 1 cup creamy peanut butter – This is the star of the show! I recommend using a standard, shelf-stable brand like Jif or Skippy for the best texture and consistency. The oil in natural peanut butter can separate and make the mixture too greasy and difficult to hold its shape.
- ¼ cup unsalted butter, softened – The butter adds richness and helps firm up the mixture when chilled, making it dippable. Chef’s Tip: Let your butter sit on the counter for 30-60 minutes before you start. It should be soft to the touch but not melted. This makes creaming it with the peanut butter a breeze!
- 1½ cups powdered sugar – Also known as confectioner’s sugar, this sweetens the deal and absorbs the oils, giving the mixture its perfect, rollable texture. It also creates that subtly crumbly, melt-in-your-mouth center.
- 1½ cups Rice Krispies cereal – The secret weapon for that iconic CRUNCH! It provides a fantastic textural contrast to the creamy peanut butter and smooth chocolate. Don’t substitute with puffed rice; you want that specific snap, crackle, and pop.
- 10 oz semi-sweet chocolate chips – The luxurious coating that brings it all home. I prefer the flavor balance of semi-sweet with the sweet peanut butter center, but feel free to use milk chocolate or dark chocolate if that’s your preference!
- 1 tbsp coconut oil or shortening (optional) – This is my little professional hack for a perfectly smooth, glossy, and thin chocolate shell. It helps thin the melted chocolate just enough for easy dipping and creates a beautiful snap when you bite into it.
Let’s Get Rolling: Your Step-by-Step Guide to Perfection
Ready to get your hands a little dirty? Let’s do this! I’ll walk you through each step with all my favorite tips and tricks to ensure your peanut butter balls are absolutely flawless.
Step 1: The Creamy Base
In a large bowl, combine the softened butter and creamy peanut butter. Use a hand mixer or a sturdy spatula to beat them together until they are completely smooth and well-incorporated. This should only take a minute or two. You’ll know it’s ready when you can’t see any streaks of yellow butter anymore. Chef’s Hack: If your butter isn’t quite soft enough, you can cut it into small chunks first to help it blend in faster.
Step 2: Sweeten the Deal
Now, gradually add in the powdered sugar. I like to add it in half-cup increments, mixing well after each addition. This prevents a giant cloud of sugar from exploding all over you and your kitchen (though a little snowstorm can be part of the fun!). Mix until the powdered sugar is fully absorbed and the mixture is thick, slightly crumbly, but holds together when you press it between your fingers.
Step 3: The Crunch Factor
Here’s where the magic happens! Add the Rice Krispies cereal. Now, be gentle. Use a folding motion with your spatula to incorporate them. You want to distribute them evenly without crushing all the lovely airy bubbles in the cereal. We’re going for maximum crunch, not crumbs!
Step 4: Roll Call!
Line a baking sheet with parchment paper or a silicone baking mat. Using a small cookie scoop (about 1 tablespoon in size) or a spoon, portion out the mixture. Then, get rolling! Roll each portion between the palms of your hands to form a neat, one-inch ball. Place each ball on the prepared tray. Pro Tip: If the mixture is too sticky, you can lightly dust your hands with powdered sugar. This batch should make about 30 perfect little orbs.
Step 5: The Essential Chill
This step is non-negotiable! Pop the entire tray into the refrigerator for at least 30 minutes. This firms up the balls, making them much easier to dip in the chocolate without falling apart. A firm, cold center is the key to a smooth coating process.
Step 6: Chocolate Dip Station
When the balls are almost chilled, it’s time to melt the chocolate. Place the chocolate chips and your tablespoon of coconut oil (or shortening) in a microwave-safe bowl. Heat in 30-second intervals on medium power, stirring vigorously between each interval. Stop when just a few small lumps remain—the residual heat will melt them as you stir. You can also use a double boiler on the stove for more control. The goal is smooth, fluid, and glossy melted chocolate.
Step 7: The Grand Finale: Dipping!
Remove the peanut butter balls from the fridge. Using a fork, a dipping tool, or even two spoons, submerge each ball into the melted chocolate. Gently tap the fork on the side of the bowl to allow the excess chocolate to drip off. This gives you a beautiful, thin, even coating. Carefully place it back on the parchment-lined tray. Repeat with all balls! Chef’s Hack: For a decorative touch, you can drizzle a little extra melted chocolate over the top with a fork before the chocolate sets, or sprinkle them with a tiny bit of flaky sea salt.
Step 8: Set It and Forget It
Once all balls are beautifully enrobed, return the tray to the refrigerator for another 20 minutes, or until the chocolate coating is completely firm and has a satisfying snap when you break one open.
How to Serve These Little Bites of Joy
Presentation is part of the fun! For a casual family treat, simply pile them high on a cute plate or in a rustic wooden bowl. If you’re gifting them, they look absolutely gorgeous stacked in a clear cellophane bag tied with a ribbon or arranged in a festive holiday tin between layers of wax paper. They’re the perfect sweet ending to a big meal, a wonderful addition to a brunch spread, or just the thing to have hiding in the fridge for a 3 pm pick-me-up with a cup of coffee. However you serve them, serve them with a smile!
Get Creative! Fun Flavor Twists & Swaps
Once you’ve mastered the classic, the playground is yours! Here are a few of my favorite ways to mix things up:
- Elvis Special: Add 3-4 tablespoons of mashed ripe banana to the peanut butter mixture and use milk chocolate for coating. A tribute to The King!
- Salty Sweet Supreme: Mix ½ cup of crushed pretzel pieces in with the Rice Krispies for a double crunch and a fantastic salty-sweet contrast.
- Nutty Buddy: Roll the finished chocolate-dipped balls in finely chopped peanuts, pecans, or toasted coconut before the chocolate sets for an extra layer of flavor and texture.
- Different Cereal, Different Vibe: Swap the Rice Krispies for an equal amount of crushed cornflakes for a slightly different crunch, or use Cocoa Krispies for a double chocolate version!
- Dietary Swap: To make gluten-free, ensure your Rice Krispies (or similar crisp rice cereal) are a certified gluten-free brand. For a dairy-free version, use vegan butter and ensure your chocolate chips are dairy-free.
Olivia’s Chef Notes & Kitchen Confessions
This recipe has been with me for over two decades, and it’s evolved in the best ways. I vividly remember the first time I made them on my own as a teenager—I was so proud, but I made the classic mistake of not chilling the balls long enough. Let’s just say I ended up with chocolate-covered peanut butter blobs instead of balls! A delicious mess, but a mess nonetheless. So learn from my mistake: patience is key.
Over the years, I’ve added the coconut oil trick after a pastry chef friend shared it with me, and it was a total game-changer. I’ve also learned that the quality of your chocolate chips really does matter. A good brand melts smoother and tastes infinitely better. Most of all, this recipe has taught me that the best cooking isn’t about perfection; it’s about the laughter when a ball slips off the fork, the joy of seeing someone’s face light up when they take the first bite, and the love that gets mixed into every single step.
Your Questions, Answered!
Q: My mixture is too dry and crumbly and won’t hold together when I try to roll it. What did I do wrong?
A: This usually means your peanut butter was a bit too thick to begin with, or you packed your powdered sugar. Don’t worry! The fix is easy. Add more moisture. Add another tablespoon of softened butter OR a tiny splash of milk or honey. Mix it in and test again. Add liquid very gradually until it just comes together.
Q: My chocolate is seizing up/getting clumpy when I try to melt it. Help!
A> Ah, the dreaded seized chocolate! This happens if even a single drop of water gets into the melting chocolate. Make sure your bowl and tools are completely dry. If it’s already happened, you can sometimes save it by immediately stirring in a teaspoon of coconut oil or vegetable shortening—this can help bring it back to a smooth state.
Q: Can I freeze these peanut butter balls?
A: Absolutely! They freeze beautifully. After the chocolate has fully set, place them in a single layer in an airtight container separated by layers of parchment paper. They will keep for up to 2 months. Thaw in the refrigerator for a few hours before serving.
Q: Why do you use coconut oil in the chocolate?
A: The coconut oil (or shortening) acts as a thinning agent. It makes the melted chocolate more fluid, which means a thinner, smoother, more professional-looking coating. It also helps the chocolate set with a beautiful glossy finish and a satisfying snap.
Peanut Butter Balls with Rice Krispies
Description
These no-bake gems combine creamy peanut butter, sweet crunch, and rich chocolate into one irresistible bite. Easy, fun, and guaranteed to bring smiles (and a little kitchen mess) to the table.
Ingredients
-
1 cup creamy peanut butter (Jif/Skippy recommended)
-
¼ cup unsalted butter, softened
-
1½ cups powdered sugar
-
1½ cups Rice Krispies cereal
-
10 oz semi-sweet chocolate chips (or milk/dark if preferred)
-
1 tbsp coconut oil or shortening (optional, for smooth coating)
Instructions
-
Mix Base – Cream peanut butter + butter until smooth.
-
Sweeten – Gradually add powdered sugar; mix until thick but rollable.
-
Add Crunch – Fold in Rice Krispies gently.
-
Roll – Scoop ~1 tbsp portions; roll into 1-inch balls. Place on parchment-lined tray.
-
Chill – Refrigerate for 30 mins to firm up.
-
Melt Chocolate – Microwave chocolate + coconut oil in 30-sec bursts, stirring until smooth.
-
Dip & Set – Coat each ball in chocolate, let excess drip off, return to tray. Chill again for 20 mins until firm.
Notes
-
Elvis Special: Add mashed banana + use milk chocolate.
-
Salty Sweet Supreme: Mix in crushed pretzels.
-
Nutty Buddy: Roll in chopped nuts or toasted coconut before chocolate sets.
-
Cocoa Twist: Swap Rice Krispies for Cocoa Krispies for double chocolate.
Nutrition
- Calories: 130 cal Per ball
- Sugar: 10g
- Fat: 8g
- Saturated Fat: 3g
Nutritional Information*
*Please note: This is an estimate provided for informational purposes only. Calculations will vary based on specific ingredients used.
Per ball (approx. 30 per recipe): Calories: 130 | Fat: 8g | Saturated Fat: 3g | Carbohydrates: 13g | Sugar: 10g | Protein: 2g | Sodium: 45mg
Final Thoughts: More Than Just a Treat
And just like that, you’ve done it! You’ve created a batch of pure, unadulterated joy. As you look at that tray of perfectly dipped peanut butter balls, I hope you feel an immense sense of pride. You didn’t just follow a recipe; you kept a wonderful tradition alive and maybe even started a new one of your own.
These little bites are a reminder that the best things in life are often the simplest. They don’t require a fancy oven or complicated techniques—just a few good ingredients and a willingness to get your hands a little messy. They’re a testament to the power of food to connect us: to past memories in a grandmother’s kitchen, to present moments of laughter with family, and to future gatherings where you’ll be the one sharing this beloved recipe.


