
Welcome to My Cozy Kitchen!
Hey there, friend! Come on in, grab an apron, and let’s get cooking. If your idea of a perfect meal involves a big, comforting bowl of creamy, cheesy pasta loaded with savory chicken, crispy bacon, and fresh green broccoli, then you and I are about to become the best of kitchen buddies. This isn’t just any mac and cheese; this is a hearty, one-pot wonder designed to feed a crowd (or your future self with amazing leftovers). The smell alone will have everyone gathered around the stove, plates in hand, begging for a taste. We’re talking about the kind of meal that turns a regular Tuesday into a celebration. It’s cozy, it’s customizable, and it’s about to become your new favorite go-to recipe. So, preheat that pot, and let’s make some magic together!
The Mac and Cheese That Started It All
This recipe takes me right back to my first-ever potluck dinner as a newlywed. I was so nervous! I wanted to bring something that screamed “I’m a competent and fun adult!” but my cooking skills were… a work in progress. My grandmother, a woman who believed butter and cheese could solve most of life’s problems, whispered her secret: “Take something everyone loves, and just make it more.” So, I took my basic mac and cheese and loaded it up with everything I had in the fridge—chicken, bacon, broccoli. It was a Hail Mary pass onto a platter. The second I walked in, the giant pot was like a magnet. It was the first dish to disappear, and I spent the whole night beaming, giving out the recipe on napkins. It taught me that the best food isn’t about being fancy; it’s about being generous, a little brave, and utterly delicious. This dish is that spirit in a pot—a little bit of comfort, a whole lot of love, and always a crowd-pleaser.
Gathering Your Ingredients
Here’s everything you’ll need to create this masterpiece. The beauty of this recipe is its flexibility, so don’t stress if you need to make a swap or two!
- 2 tbsp olive oil: Our cooking fat to get that chicken beautifully golden. Avocado oil works great here too.
- 1 lb bacon, diced: For that irreplaceable smoky, salty, crispy goodness. For a leaner option, try turkey bacon or even pancetta.
- 2 lb chicken breasts: I like to halve them lengthwise for quicker, more even cooking. Feel free to use chicken thighs for even more juicy flavor!
- 1 tsp kosher salt, 1/2 tsp black pepper, 1 tsp paprika: This simple trio is our flavor base for the chicken. The paprika adds a subtle warmth and gorgeous color.
- 8 cloves garlic, minced: Don’t you dare skimp! Fresh is best for that punchy, aromatic depth.
- 24 oz (1.5 lb) elbow pasta: The classic mac and cheese shape! Its nooks and crannies hold onto all that creamy sauce. Cavatappi or shells are fun alternatives.
- 8 cups low-sodium chicken broth: Using low-sodium allows you to control the salt level, especially since the bacon and cheese bring their own saltiness.
- 24 oz evaporated milk (2 cans): My secret weapon for ultra-creamy, non-grainy sauce without making a roux! It’s magic.
- 20 oz sharp cheddar cheese, freshly shredded: PLEASE shred your own! Pre-shredded bags contain anti-caking agents that can make your sauce grainy and less smooth. Sharp cheddar gives us that classic, tangy flavor.
- 8 oz Monterey Jack cheese, shredded: Our “twist” cheese! It melts like an absolute dream, adding a buttery, mild flavor that complements the cheddar perfectly.
- 24 oz broccoli florets: Fresh is ideal for the best texture and bright green color. You can use frozen—just thaw and pat dry first to avoid watering down the sauce.
- 2 tsp Dijon mustard: The “why is this so good?!” ingredient. It doesn’t taste mustardy; it just adds a incredible depth of flavor and helps emulsify the sauce.
For the Optional Crunchy Topping (Highly Recommended!):
- 1 cup panko breadcrumbs: They stay so much crispier than regular breadcrumbs.
- 2 tbsp butter, melted: To toast the panko to golden perfection.
- 1/2 cup Parmesan cheese: For a salty, savory kick in every crunchy bite.
Let’s Get Cooking: Your Step-by-Step Guide
Follow these steps, and you’ll have a perfect, creamy, one-pot mac and cheese in no time. I’ve packed each step with my best tips and tricks!
Step 1: Bacon First! Place your large pot or Dutch oven over medium heat. Add the diced bacon and cook, stirring occasionally, until it’s beautifully crispy and has rendered its fat. This takes about 8-10 minutes. Use a slotted spoon to remove the bacon to a paper towel-lined plate, leaving about 1 tablespoon of that glorious bacon drippings in the pot. This liquid gold is packed with flavor we’re going to use to cook everything else!
Step 2: Golden Chicken: Pat your chicken breasts dry with a paper towel—this is the key to getting a good sear, not a steam! Halve them lengthwise if they’re large. Season both sides generously with the salt, pepper, and paprika. Add the olive oil to the pot with the bacon drippings. Place the chicken in the pot and cook for about 4-5 minutes per side, until it’s golden brown on the outside and cooked through. Remove the chicken to a cutting board to rest. It will finish cooking from residual heat, and resting ensures it stays juicy.
Step 3: Pasta Power: Now, to the same pot, add the minced garlic. Stir for just 30 seconds until fragrant—don’t let it burn! Immediately add the dry elbow pasta. Pour in the chicken broth and evaporated milk. Give everything a good stir, scraping up any browned bits from the bottom of the pot (that’s pure flavor!). Bring the liquid to a lively simmer, then reduce the heat to medium-low to maintain the simmer. Cook for 8-10 minutes, stirring frequently to prevent the pasta from sticking. You want the pasta to be just al dente (slightly firm to the bite) because it will continue to cook a little later.
Step 4: The Big Cheese: Turn the heat down to low. It’s cheese time! Gradually add the shredded cheddar and Monterey Jack cheeses, one handful at a time, stirring constantly and waiting for each addition to melt before adding the next. This patience is the secret to a smooth, velvety sauce, not a clumpy one. Once all the cheese is melted and creamy, stir in the Dijon mustard. Taste it! This is where you can adjust seasoning—add more salt or pepper if you like.
Step 5: Bring It All Home: While the cheese was melting, you should have diced your rested chicken. Now, add the diced chicken, crispy bacon, and broccoli florets to the cheesy pasta. Stir gently but thoroughly to combine. Let it cook for another 2-3 minutes, just until the broccoli turns bright green and is tender-crisp. You want a little bite to it for texture! Remove the pot from the heat.
Step 6: The Optional (But Amazing) Finishing Touch: If you’re going for the baked version, preheat your broiler to high. In a small bowl, mix the panko, melted butter, and Parmesan cheese. Transfer the mac and cheese to a 9×13 inch baking dish (or keep it in your oven-safe pot!). Sprinkle the panko mixture evenly over the top. Place it under the broiler for 2-3 minutes, WATCHING IT CONSTANTLY, until the topping is golden brown and crunchy. And that’s it! You’ve just created comfort food perfection.
How to Serve This masterpiece
This dish is a complete meal in a pot, so serving is a breeze! Ladle generous portions into deep bowls. The steam rising, the cheese stretching—it’s a beautiful thing. For a lovely touch, garnish with a little extra sprinkle of fresh chopped parsley or chives and a crack of black pepper. It pairs wonderfully with a simple side salad with a light vinaigrette to cut through the richness, and a crisp glass of white wine or a cold cider. Most importantly, serve it with a big smile to your very happy, hungry people.
Make It Your Own: Delicious Variations
The fun doesn’t stop here! This recipe is a fantastic canvas for your creativity.
- Spicy Southwest: Swap the paprika for 1 tbsp of taco seasoning. Use a blend of pepper Jack and cheddar cheese. Stir in a 4 oz can of diced green chiles with the broccoli.
- Everything But the Kitchen Sink: Add a cup of frozen peas and carrots with the broccoli for extra veggie power and color.
- Gluten-Free/Different Pasta: Use your favorite gluten-free pasta and ensure your broth is gluten-free. The cooking time may vary slightly, so check the package instructions.
- Buffalo Chicken: Toss the diced cooked chicken in 1/2 cup of buffalo sauce before adding it back in. Use a colby jack and blue cheese crumble combo for the cheeses!
- Lighter Version: Use turkey bacon, low-fat evaporated milk, and reduced-fat cheese. The sauce will be slightly less rich but still delicious.
From My Kitchen to Yours: Chef’s Notes
This recipe has evolved so much from that first nervous potluck attempt! I’ve learned a few things along the way. First, the Dijon mustard was a happy accident—I knocked it into the pot once and decided to just roll with it. Best mistake ever! Second, I’ve found that letting the finished mac and cheese sit for 5-10 minutes off the heat before serving allows the sauce to thicken up perfectly. It goes from “perfect” to “sublime.” And a funny story: I once was talking so much while cooking that I added the cheese before the pasta was done. The sauce got a bit grainy, but you know what? My friends still ate every last bite and asked for the recipe. It’s a forgiving, wonderful dish. Don’t be afraid of it!
Your Questions, Answered
Q: My sauce seems a little thin. How can I thicken it up?
A: Don’t worry! First, let it sit for 5-10 minutes; the pasta will continue to absorb the liquid. If it’s still too thin, make a quick slurry by mixing 1 tablespoon of cornstarch with 2 tablespoons of cold water or milk. Stir this into the mac and cheese and simmer for another minute or two until thickened.
Q: Can I make this ahead of time?
A: Absolutely! Assemble the entire dish (without the panko topping) and let it cool completely. Store it covered in the fridge for up to 2 days. When ready, you may need to add a splash of milk or broth when reheating as the pasta will absorb liquid. Reheat on the stovetop over medium-low heat, stirring often, or in a 350°F oven until bubbly. Then add the panko topping and broil.
Q: Why did my cheese sauce turn out grainy or clumpy?
A: This usually happens for one of two reasons: 1) The heat was too high when the cheese was added. Always add cheese off the heat or on the lowest possible setting. 2) Pre-shredded bagged cheese was used. These cheeses are coated to prevent clumping in the bag, which also prevents them from melting smoothly into a sauce. Freshly shredding your cheese is the #1 way to guarantee a silky-smooth sauce.
Q: Can I use frozen broccoli?
A: You can! There’s no need to cook it first. Thaw it completely and pat it very dry with paper towels to remove excess moisture. Add it at the very end, as directed, and just heat it through. This prevents your sauce from becoming watery.

Chicken Mac and Cheese with Bacon and Broccoli
Description
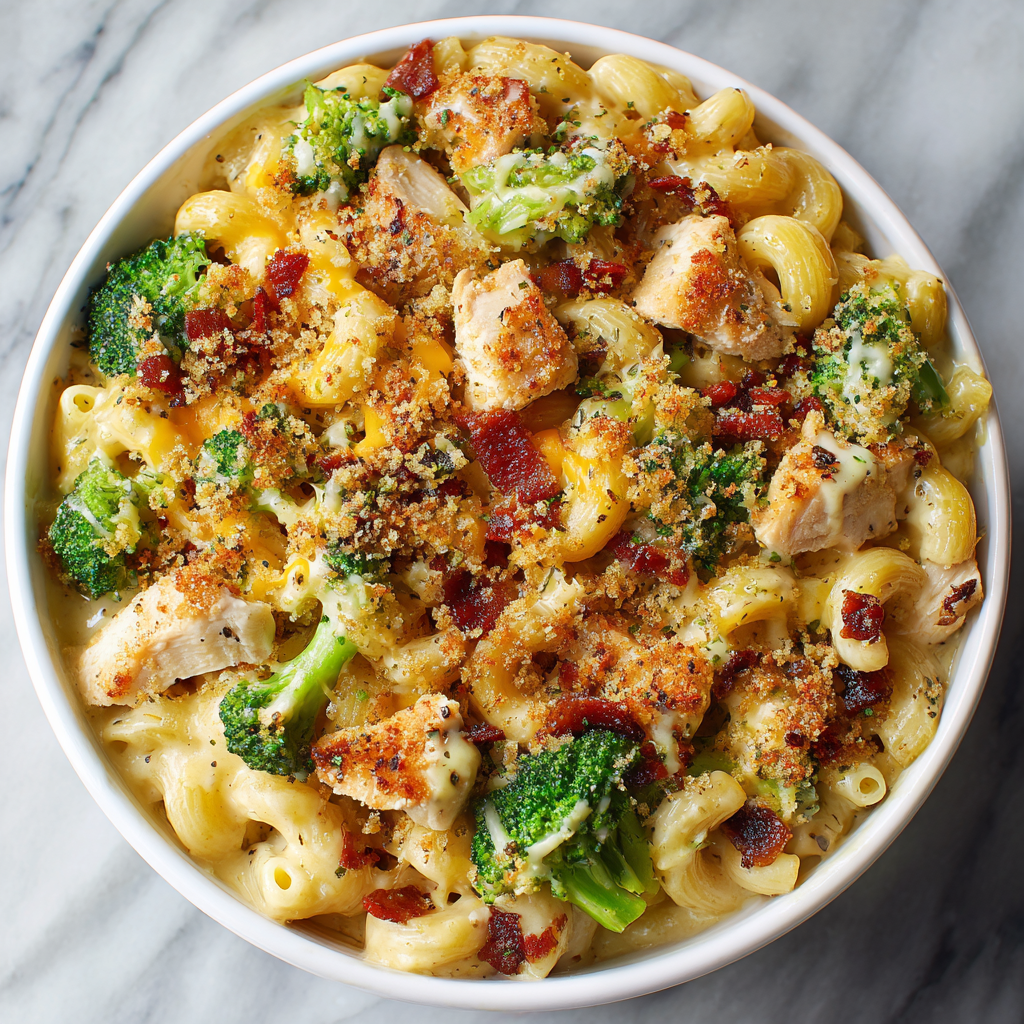
This one-pot wonder is comfort food at its finest—creamy, cheesy pasta loaded with juicy chicken, smoky bacon, and crisp-tender broccoli. It’s hearty enough to stand on its own, feeds a crowd, and is always the first dish to vanish at the table.
Ingredients
Base
-
2 tbsp olive oil
-
1 lb bacon, diced
-
2 lb chicken breasts (or thighs), halved lengthwise
-
1 tsp kosher salt
-
½ tsp black pepper
-
1 tsp paprika
-
8 cloves garlic, minced
-
24 oz elbow pasta (1.5 lb)
-
8 cups low-sodium chicken broth
-
24 oz evaporated milk (2 cans)
-
20 oz sharp cheddar cheese, freshly shredded
-
8 oz Monterey Jack cheese, shredded
-
24 oz broccoli florets
-
2 tsp Dijon mustard
Optional Topping
-
1 cup panko breadcrumbs
-
2 tbsp melted butter
-
½ cup Parmesan cheese
Instructions
-
Cook the bacon: In a large pot/Dutch oven over medium heat, cook bacon until crispy (≈8–10 min). Remove with a slotted spoon; leave 1 tbsp bacon fat in pot.
-
Sear the chicken: Season chicken with salt, pepper, and paprika. Add olive oil to pot. Cook chicken 4–5 min per side until golden and cooked through. Transfer to rest.
-
Cook pasta: Add garlic, sauté 30 sec. Stir in dry pasta, broth, and evaporated milk. Scrape up browned bits. Simmer 8–10 min, stirring often, until pasta is al dente.
-
Make sauce: Reduce heat to low. Add cheeses slowly, a handful at a time, stirring until smooth. Stir in Dijon mustard. Taste and adjust seasoning.
-
Combine: Dice chicken. Stir in chicken, bacon, and broccoli. Cook 2–3 min until broccoli is bright green and tender-crisp.
-
Optional topping: Mix panko, butter, and Parmesan. Sprinkle over pasta in an oven-safe dish. Broil 2–3 min until golden and crisp.
Notes
-
Rest chicken before dicing—this keeps it juicy.
-
Add cheese slowly over low heat for the creamiest sauce.
-
Let the mac rest 5–10 min before serving; the sauce thickens beautifully.
Nutrition
- Calories: 790 cal Per Serving
- Fat: 38g
Nutritional Information (Per Serving)
Please note: This is an estimate and will vary based on specific ingredients used.
Yield: 12 Servings | Serving Size: Approximately 1.5 cups
Calories: ~790 | Total Fat: 38g | Saturated Fat: 18g | Cholesterol: 145mg | Sodium: 1120mg | Total Carbohydrates: 58g | Dietary Fiber: 6g | Sugar: 10g | Protein: 45g
Final Thoughts: A Bowl Full of Comfort
Well, friend, we’ve done it. We’ve transformed simple ingredients into a pot of pure, unadulterated comfort. This isn’t just a recipe; it’s a warm hug in a bowl, a solution for busy weeknights, and the star of every potluck. I hope it brings as much joy to your table as it has to mine over the years.
Remember, the best meals are the ones made with a pinch of adventure and a whole lot of heart. Don’t be afraid to make this recipe your own—tweak it, add your favorite ingredients, and create your own kitchen stories. That’s what cooking is all about.


