
Santa’s Belly Sugar Cookies: The Most Festive (and Delicious) Cookie on the Block!
Hello, my fellow kitchen adventurers! Olivia here, waving at you from a kitchen that currently looks like a festive bomb went off – and I wouldn’t have it any other way. Is there anything that captures the magic of the holiday season quite like the smell of buttery sugar cookies baking in the oven? It’s a scent that promises joy, togetherness, and a whole lot of deliciousness. It’s the universal signal that the most wonderful time of the year is truly here.
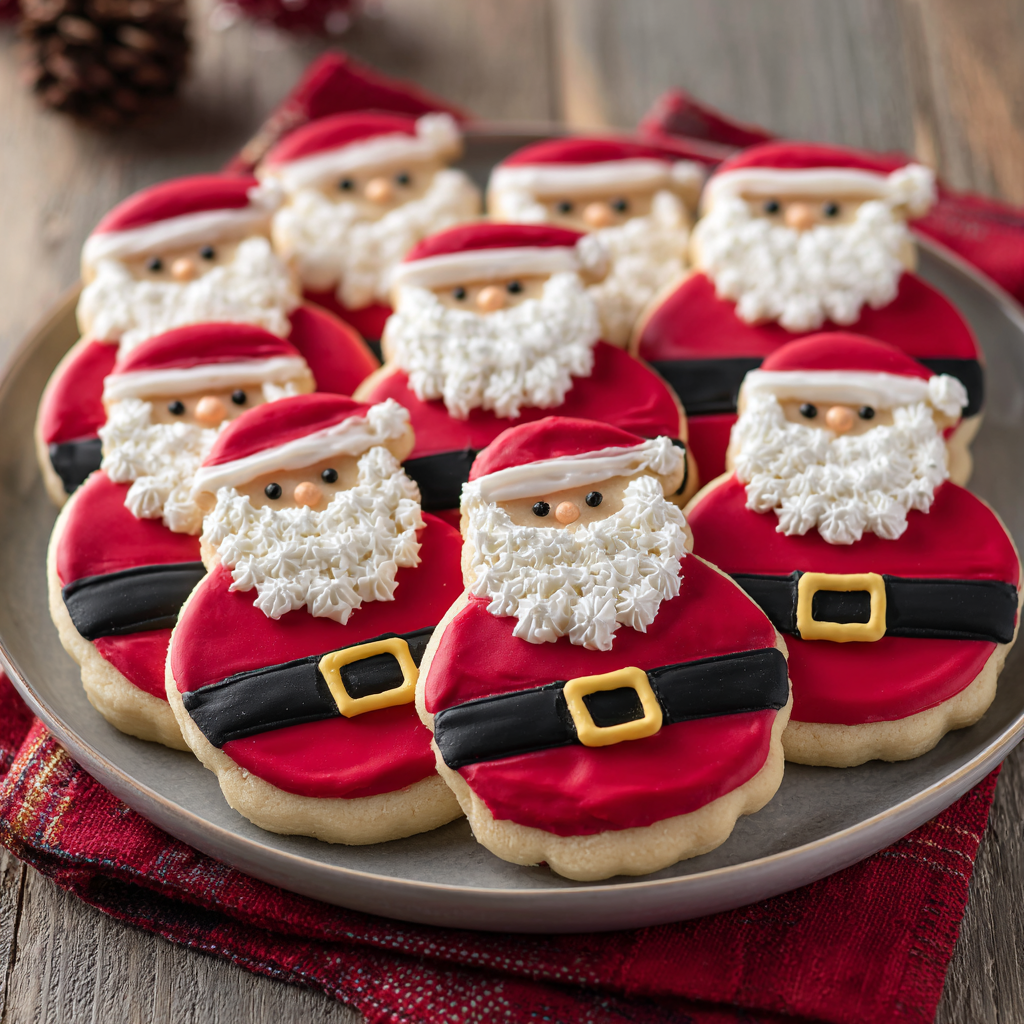
Today, we’re not just making any sugar cookie. Oh no. We’re creating a centerpiece, a conversation starter, the cookie that will have everyone at your cookie exchange gasping with delight. We’re making Santa’s Belly Sugar Cookies! These adorable treats are a buttery, tender sugar cookie base transformed into jolly old St. Nick himself with a swath of red icing, a sleek black belt, and a shiny golden buckle. They’re fun, they’re festive, and I promise, they are an absolute blast to make. Whether you’re baking with little ones, having a girls’ night in, or simply treating yourself to some creative kitchen therapy, these cookies are the perfect project. So, tie on your favorite (probably messy) apron, put on some holiday tunes, and let’s create some magic together!
A Cookie Tradition is Born
This recipe holds a special place in my heart because it was born out of a near-disaster that turned into our favorite holiday tradition. Years ago, I was attempting a complicated gingerbread house with intricate royal icing details. Let’s just say the walls were more “leaning tower of Pisa” than “cozy holiday cottage.” Frustrated but determined to use my red and black icing, I looked at a simple round sugar cookie I had baked as a test and saw a blank canvas. A little red icing here, a black belt there… and just like that, Santa’s belly appeared!
My family erupted in laughter. It was silly, it was simple, and it was utterly perfect. We spent the rest of the evening transforming every round cookie into a jolly Santa, laughing and decorating together. That messy gingerbread house was long forgotten. Now, every year, the first weekend of December is dedicated to baking these cookies. The kitchen fills with music, the air with the scent of vanilla and butter, and our hearts with the joy of creating something together. It’s a reminder that the best moments aren’t about perfection; they’re about the love and laughter you stir into the mix.
Gathering Your Cookie Crew (a.k.a. The Ingredients)
This recipe uses simple, pantry-staple ingredients for the cookie itself, letting the fun decorations do all the talking. Here’s what you’ll need to make about two dozen cheerful Santa cookies:
For the Sugar Cookies:
- 1 cup (2 sticks) unsalted butter, softened – This is the foundation of our rich, tender cookie. Using unsalted butter lets us control the salt level perfectly. Chef’s Insight: Your butter is perfectly softened when you can press your finger into it easily and leave an indentation, but it’s not greasy or melted. This is key for creaming!
- 1 cup granulated sugar – For that classic, sweet sugar cookie flavor and helping to create a slight crispness on the edges.
- 1 large egg – Our binding agent, bringing the dough together and adding structure. Make sure it’s at room temperature to blend smoothly with the butter and sugar.
- 1½ tsp pure vanilla extract – The flavor MVP! Pure vanilla adds a warm, deep flavor that imitation vanilla just can’t match.
- 2½ cups all-purpose flour – The structure of our cookie. I like to fluff my flour in the container, spoon it into the measuring cup, and level it off to avoid over-packing and ending up with dry dough.
- ½ tsp baking powder – Our little leavening helper that gives the cookies a slight lift and a soft, cake-like texture, preventing them from being too hard.
- ¼ tsp salt – The flavor enhancer! Salt balances the sweetness and makes all the other flavors pop. Don’t skip it!
For the Festive Decorations:
- Red royal icing or red-tinted cookie icing – This is Santa’s iconic red suit! I’m a huge fan of using a pre-made red royal icing in a tub or a squeeze bottle for ease and vibrant color. If you’re tinting your own, use gel food coloring for the most intense red without thinning your icing too much.
- Black decorating gel or black icing – For the belt. Decorating gels in a tube are fantastic here because they are thick, easy to control, and set with a slight shine.
- Yellow or gold icing, fondant, or even a yellow candy melt – For the buckle! This is where you can get creative. Pre-colored yellow tube icing works, but I love using a small piece of rolled fondant or a single yellow candy melt placed on while the black icing is still wet.
Let’s Build Santa’s Belly! Step-by-Step Instructions
Ready to create some cookie magic? Follow these steps, and you’ll have a tray of perfect, jolly cookies in no time. I’ve packed this section with all my best tips and tricks I’ve learned over the years!
- Preheat and Prep: Preheat your oven to 350°F (175°C). Line your baking sheets with parchment paper. This is my number one secret for perfectly baked cookies – no sticking, even baking, and easy clean-up! Chef’s Hack: If you have light-colored baking sheets, use them! They reflect heat and prevent the bottoms of your cookies from over-browning. Dark sheets can absorb too much heat.
- Cream the Good Stuff: In a large bowl, beat the softened butter and granulated sugar together on medium-high speed for a full 2-3 minutes. We’re not just mixing; we’re creaming. This process incorporates air into the dough, which is what gives our cookies that lovely, light texture. You’ll know it’s ready when the mixture becomes pale yellow and fluffy.
- Incorporate the Wet Ingredients: Beat in the egg and vanilla extract until everything is beautifully combined and smooth. Scrape down the sides of the bowl with a spatula to make sure no rogue butter is hiding down there.
- Bring in the Dry Team: In a separate bowl, whisk together the flour, baking powder, and salt. This ensures the leavening and salt are evenly distributed. Gradually add the dry ingredients to the wet ingredients, mixing on low speed just until the flour disappears and a soft dough forms. Pro Tip: Over-mixing at this stage can develop the gluten in the flour and make your cookies tough. Mix until just combined!
- The Chill Factor: This step is non-negotiable! Form the dough into a disc, wrap it in plastic wrap, and chill it in the refrigerator for at least 20-30 minutes. Chilling the dough solidifies the butter, which prevents the cookies from spreading too much in the oven. It also makes the dough much easier to roll out.
- Roll and Cut: On a lightly floured surface, roll your dough out to about a ¼-inch thickness. This is the perfect thickness – sturdy enough to hold the icing but not too thick to bake evenly. Use a simple round cookie cutter (about 3 inches in diameter is perfect) to cut out your circles. Place them on your prepared baking sheets about 2 inches apart. Kitchen Story: I save the scraps, re-roll them once, and cut out more circles. Any more than that and the cookies can get a bit tough from over-working the dough.
- Bake to Perfection: Bake for 8-10 minutes. You’re looking for the edges to be set and just barely starting to turn a light golden brown. The centers should still look soft. This is crucial! They will continue to cook on the hot baking sheet as they cool. Over-baking is the enemy of a soft sugar cookie!
- The Patient Part: Let the cookies cool on the baking sheet for 5 minutes before transferring them to a wire rack to cool completely. I know it’s tempting to start decorating, but if you ice a warm cookie, it will melt into a puddle of sadness. Let’s avoid the puddle.
- Time for the Red Suit: Once the cookies are completely cool, it’s time to decorate! Frost the top of each cookie with your red icing, leaving a small border of cookie visible around the edge to be the “fur trim” of Santa’s suit. Let this layer of icing set completely. If you’re using royal icing, this might take an hour or two. If you’re using a thicker canned icing, it might set faster.
- Add the Belt and Buckle: Once the red icing is dry to the touch, pipe a thick black belt horizontally across the center of the cookie. While the black icing is still wet, carefully place your gold buckle in the center. If you’re using yellow icing to pipe a buckle, you can do it once the black belt has set a little. And voilà! You’ve just created a squadron of jolly Santa cookies!
How to Serve Up Some Holiday Cheer
Presentation is part of the fun! Pile these cheerful cookies high on a festive platter or a rustic wooden board for a gorgeous holiday dessert table. They are the ultimate cookie exchange offering – guaranteed to make you the most popular baker there. They also make adorable edible gifts! Stack a few in a clear cellophane bag, tie it with a ribbon, and you have a heartfelt, homemade present that anyone would love to receive. Of course, they’re also best served with a cold glass of milk for Santa (and for you!) and a big, happy smile.
Mix It Up! Fun Recipe Variations
Feel like putting your own spin on this classic? Go for it! Here are a few ideas:
- Chocolate Lover’s Santa: Add ½ cup of cocoa powder to the dry ingredients for a chocolate sugar cookie base. Santa’s suit will be a deep, delicious brown instead of red!
- Peppermint Twist: Add ½ teaspoon of peppermint extract along with the vanilla for a cool, festive flavor that pairs perfectly with the sweet icing.
- “Fancy Belt” Santa: Use a strip of a chocolate bar (like a Hershey’s bar) for the belt and a piece of a yellow peanut butter cup or a square of caramel for the buckle!
- Gluten-Free Jolly Old Elf: Substitute the all-purpose flour with a 1:1 gluten-free baking blend. I’ve had great success with Bob’s Red Mill and King Arthur blends.
- Citrus Zest: Add the zest of one orange to the dough for a bright, citrusy note that cuts through the sweetness beautifully.
Olivia’s Chef Notes & Kitchen Stories
This recipe has evolved so much since that first frantic gingerbread rescue mission! One year, I was out of black gel and had to get creative. I melted dark chocolate chips with a tiny bit of coconut oil and used a piping bag – it worked like a charm and tasted amazing! Another time, my nephew decided Santa needed a face, so we added two little white dots for eyes and a rosy red cheek. It was adorable. Don’t be afraid to play and make this recipe your own.
The biggest lesson I’ve learned? Embrace the imperfections. Maybe one Santa’s belt is a little wobbly, or another’s buckle is off-center. It gives them character! They are homemade with love, and that’s what makes them special. The goal is to have fun and fill your home with the spirit of the season. Now, go make a beautiful, delicious mess!
FAQs & Troubleshooting
Q: My cookies spread too much and lost their round shape! What happened?
A: This is usually caused by butter that was too warm. Make sure your butter is just softened, not melted. Chilling the dough is also critical – don’t skip it! Also, double-check that your baking powder isn’t expired, as it provides the necessary lift.
Q: My red icing isn’t very vibrant. How do I get that bright, classic Santa red?
A: Liquid food coloring can dilute your icing. I highly recommend using gel food coloring. It’s highly concentrated, so you need less of it to achieve a deep, bold red without changing the consistency of your icing. Start with a little and add more until you get the color you want.
Q: Can I make the cookie dough ahead of time?
A: Absolutely! This dough is perfect for making ahead. Wrap the disc of dough tightly in plastic wrap and you can refrigerate it for up to 3 days. You can also freeze it for up to 3 months. Just thaw it overnight in the fridge before rolling it out.
Q: The black gel icing is smearing into the red. How can I prevent this?
A: Patience is key here! You must let the base layer of red icing dry completely before adding the black details. If it’s still even slightly tacky, the black gel can bleed. To speed things up, you can place the iced cookies in a single layer in front of a fan on a low setting.

Santa’s Belly Sugar Cookies
Description
These cookies are pure holiday cheer baked into a circle! Buttery, tender sugar cookies get dressed up as Santa’s jolly belly with red icing, a black belt, and a golden buckle. They’re festive, fun, and the perfect treat for cookie swaps, edible gifts, or cozy nights by the fire. Grab your apron and turn your kitchen into Santa’s sweetest workshop!
Ingredients
For the Cookies
-
1 cup (2 sticks) unsalted butter, softened
-
1 cup granulated sugar
-
1 large egg (room temp)
-
1½ tsp vanilla extract
-
2½ cups all-purpose flour
-
½ tsp baking powder
-
¼ tsp salt
For Decorating
-
Red royal icing (or red-tinted cookie icing)
-
Black decorating gel or black icing
-
Yellow or gold icing, fondant, or candy melt (for buckle)
Instructions
-
Preheat oven to 350°F (175°C). Line baking sheets with parchment.
-
Cream butter + sugar until pale and fluffy (2–3 min). Beat in egg + vanilla.
-
Whisk flour, baking powder, salt separately, then mix into wet just until combined.
-
Chill dough 20–30 min wrapped in plastic.
-
Roll dough ¼-inch thick, cut circles (3-inch cutter). Place 2” apart on trays.
-
Bake 8–10 min until edges are set but centers look soft. Cool fully before decorating.
-
Decorate: Spread red icing for Santa’s suit. Once set, add black belt, then a yellow buckle.
Nutrition
- Calories: 160 cal Per Serving
- Sugar: 12g
- Fat: 7g
- Saturated Fat: 4.5g
- Carbohydrates: 20g
Nutritional Information (Estimated Per Cookie)
Calories: ~160 | Fat: 7g | Saturated Fat: 4.5g | Cholesterol: 25mg | Sodium: 35mg | Carbohydrates: 20g | Sugar: 12g | Protein: 1g
*Please note: This is an estimate based on the ingredients used and will vary slightly depending on specific brands and decoration amounts.
Final Thoughts: More Than Just a Cookie
As the last cookie is decorated and the final holiday tune fades from the speakers, I hope you look at your tray of jolly Santa bellies with a immense sense of pride and joy. These cookies are so much more than just a festive treat; they are a tangible piece of holiday magic, created by your own hands.
Remember, the true magic of this recipe isn’t in achieving a perfectly straight belt or a flawlessly round buckle. It’s in the laughter that filled your kitchen, the flour dusted on your nose, and the shared moment of creativity. It’s in the tradition you’ve either continued or just begun. These cheerful cookies are a celebration of the season’s simple pleasures: warmth, togetherness, and the pure, uncomplicated joy of giving something made with love.


