

The Ultimate Holiday Cookie: Festive Candy Cane Cookies
Hello, my fellow food lovers! Olivia here, welcoming you back to my kitchen. Can you smell that? It’s the unmistakable scent of butter, sugar, and a little bit of holiday magic wafting through the air. There’s something about this time of year that makes me want to tie on my favorite (and yes, perpetually messy) apron, crank up the Christmas carols, and fill every available surface with homemade cookies. And if there’s one cookie that truly captures the playful, festive spirit of the season, it’s the iconic Candy Cane Cookie.
These aren’t just any cookies; they’re a project of pure joy. They’re soft, buttery, and infused with just the right amount of cool peppermint, all swirled together in a cheerful red-and-white twist that looks just like the classic holiday candy. They’re the star of every cookie swap, the treasure hidden in holiday gift tins, and the perfect companion to a steaming mug of hot cocoa on a chilly afternoon. Best of all, they’re so much fun to make. So, whether you’re a seasoned baker or a nervous newbie, I promise you can handle this. Let’s create some delicious, edible holiday cheer together!
A Twist of Nostalgia: My First Candy Cane Cookie Disaster
I’ll never forget the first time I attempted these cookies. I was about ten years old, “helping” my grandmother in her wonderfully chaotic kitchen. We had the dough made, the red food coloring at the ready, and grand ambitions of creating a platoon of perfect peppermint soldiers. Well, my little hands had a different idea. Instead of gently twisting the ropes of dough, I manhandled them. The result? Not elegant candy canes, but a baking sheet full of what my brother lovingly called “Christmas slugs” – pinkish-brown, blobby, and slightly sad.
But you know what? They still tasted incredible. That day, my grandma taught me one of the most important kitchen lessons I’ve ever learned: it doesn’t have to be perfect to be wonderful. The joy is in the making, the laughing, and the sharing. Now, every year when I twist these dough ropes, I think of her and her unwavering patience. I’ve perfected the technique since then (no more slugs, I promise!), but the heart of the recipe—the fun, the family, and the fantastic flavor—remains exactly the same.
Gathering Your Cookie Crew: The Ingredients
This is a simple, classic shortbread-style dough, and each ingredient plays a key role. Here’s what you’ll need and why it’s important:
- 1 cup unsalted butter, softened – This is the foundation of our rich, tender cookie. Using unsalted butter lets us control the salt level. Chef’s Insight: “Softened” means your butter should give slightly when you press it, but your finger shouldn’t sink right through. Leave it on the counter for about an hour before you start.
- 1 cup powdered sugar, sifted – Powdered sugar gives us a melt-in-your-mouth texture that granulated sugar can’t. Sifting it first prevents lumps and makes for a smoother dough. It’s a small step that makes a big difference!
- 1 large egg, room temperature – The egg binds everything together. A room-temperature egg incorporates much more easily into the butter and sugar, creating a smoother, more emulsified dough.
- 1 tsp vanilla extract – This adds a warm, familiar depth of flavor that complements the peppermint beautifully. Fun Swap: Try almond extract for a subtle, nutty twist that’s absolutely divine.
- ½ tsp peppermint extract – The star of the show! Start with ½ tsp; it provides a clear, cool flavor without being overwhelming. You can always add a tiny bit more if you’re a serious peppermint fan.
- 2 ½ cups all-purpose flour – The structure of our cookie. I always fluff my flour with a spoon before gently scooping and leveling it off with a knife. This prevents accidentally using too much and ending up with dry dough.
- ½ tsp salt – Never skip the salt! It balances the sweetness and enhances all the other flavors. It’s the secret weapon in every good dessert.
- Red gel food coloring (or natural alternative like beet powder) – Gel food coloring gives a vibrant red color without adding extra liquid to the dough. For a natural route, mix 1-2 teaspoons of beet powder with a few drops of water to form a paste before kneading it in.
- Optional: Coarse sea salt or sparkling sugar for garnish – A tiny sprinkle just before baking adds a delightful crunch and a professional finish.
Let’s Get Twisting: The Step-by-Step Guide
Ready to make some magic? Follow these steps, and you’ll have a bakery-worthy batch of cookies in no time. Read through all the steps first—it’s my number one tip for any baking project!
Step 1: The Creamy Foundation
In the bowl of a stand mixer fitted with the paddle attachment (or a large bowl with a hand mixer), beat the softened butter and sifted powdered sugar together on medium speed. We’re not just mixing; we’re “creaming.” Beat it for a full 2-3 minutes until it becomes noticeably lighter in color and fluffy. This incorporates air, which is key for a tender cookie. Don’t rush this step!
Step 2: Bringing it Together
Scrape down the sides of the bowl with a rubber spatula. Add the room-temperature egg, vanilla extract, and peppermint extract. Mix on medium until everything is perfectly smooth and combined. It should look like a velvety, pale yellow batter.
Step 3: The Dry Team
In a separate bowl, whisk together your flour and salt. This ensures the salt is evenly distributed. With the mixer on low speed, gradually add the flour mixture to the wet ingredients. Mix just until the flour disappears and a soft dough forms. Overmixing at this stage can make the cookies tough, so as soon as you don’t see any dry flour, stop the mixer!
Step 4: Seeing Red (Half of It, Anyway)
Divide the dough right in half. Place one half back in the mixer bowl. This is where we add our color! Add your red gel food coloring a few drops at a time, mixing on low until you achieve a uniform, festive red. If using a natural beet paste, you’ll need to knead it in by hand on a clean surface. Pro tip: Wear disposable gloves for this part unless you want holiday-red hands for the day!
Step 5: The Patience Part (Chill Time!)
Wrap each ball of dough in plastic wrap and chill them in the refrigerator for at least 30 minutes. This is non-negotiable! Chilling firms up the butter, making the dough much easier to handle and roll. It also prevents the cookies from spreading too much in the oven.
Step 6: Preheat and Prep
While the dough chills, preheat your oven to 350°F (175°C) and line your baking sheets with parchment paper. Trust me, parchment paper is your best friend for easy cleanup and preventing any sticking.
Step 7: The Main Event – Shaping the Canes
Now for the fun part! Take about 1 teaspoon of the plain dough and roll it on a clean surface into a rope about 4-5 inches long. Do the same with a teaspoon of the red dough. Place the two ropes side-by-side and gently press them together at one end. Now, simply twist them together like a barber pole! Gently curl the top down to form the classic candy cane hook. Place them on your prepared baking sheet about 2 inches apart. If the dough gets too soft and sticky, just pop it back in the fridge for 10 minutes.
Step 8: Bake to Perfection
Bake for 9-11 minutes. You’re looking for the cookies to be “set” – they should not look wet or shiny on top. The edges might just be starting to show the faintest hint of golden brown. They will still be very soft, and that’s perfect! They firm up as they cool. Do not overbake!
Step 9: The Cool Down
Let the cookies cool on the baking sheet for 5 minutes. This allows them to finish setting up. Then, carefully transfer them to a wire rack to cool completely. If you’re adding a sugar garnish, do it now while they’re still slightly warm so it sticks.
Sharing the Joy: How to Serve Them
These cookies are a showstopper all on their own! Pile them high on a vintage holiday platter for your Christmas party. For gifting, place them in a cellophane bag tied with a festive ribbon, or carefully layer them in a holiday tin between sheets of parchment paper. And my favorite way to enjoy them? With a giant mug of rich hot chocolate, preferably by the light of the Christmas tree. They’re also a delightful, sweet surprise tucked into a lunchbox or enjoyed as a midday treat.
Make Them Your Own: Delicious Variations
Feel like playing? Here are a few fun ways to switch up this classic recipe:
- The Chocolate Drizzle: Melt some white chocolate chips and drizzle it over the cooled cookies. Immediately sprinkle with crushed candy canes for extra peppermint crunch and color.
- The Flavor Twist: Add a pinch of cinnamon or a dash of nutmeg to the dry ingredients for a warm, spiced undertone that pairs wonderfully with the peppermint.
- The Softer Bite: For an even more tender, meltaway texture, replace 2 tablespoons of the flour with 1 tablespoon of cornstarch.
- The “Grinch” Version: Use green food coloring instead of red for a fun, Dr. Seuss-inspired treat!
- The Allergy-Friendly Swap: Use a trusted gluten-free 1:1 flour blend to make them gluten-free. For dairy-free, use a high-quality plant-based butter.
From My Kitchen to Yours: Chef’s Notes
This recipe has been through many iterations in my kitchen. I’ve learned that the key to the perfect twist is confidence! Don’t be timid when rolling the ropes; a firm, even pressure gives you the best shape. If they break, just smoosh them together and start again. No one will know! I also used to skip the chilling step (impatience is my baking nemesis), but I can now definitively say it is 100% worth the wait. It’s the difference between a crisp, defined candy cane and a… well, a Christmas slug. My family still teases me about that first batch, and it’s a reminder that the best recipes are the ones that come with a story and a whole lot of love.
Your Questions, Answered: FAQs & Troubleshooting
Q: My dough is too sticky to roll! What did I do wrong?
A: This usually means the dough needs more chilling time. Pop it back in the fridge for another 15-20 minutes. It could also be that you slightly under-measured your flour. Next time, ensure you’re using the “spoon and level” method for accuracy.
Q: Why did my cookies spread and lose their shape?
A: The most common culprits are butter that was too warm or not chilling the dough long enough. Your butter should be softened, not melted. Also, make sure your oven is fully preheated before the baking sheets go in.
Q: Can I make the dough ahead of time?
A: Absolutely! You can make the dough, wrap it tightly, and keep it in the refrigerator for up to 2 days. Let it sit at room temperature for about 10-15 minutes before attempting to roll it out, or it might be too hard.
Q: My red dough is staining my white dough when I twist. Help!
A: This can happen, especially with very potent food colorings. Make sure your doughs are well-chilled, as firmer dough bleeds less. Also, work quickly and handle the dough as little as possible when twisting.
Print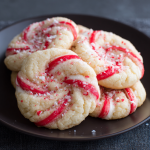
Candy Cane Cookies
- Total Time: 40 minutes
Description
Soft, buttery, and infused with peppermint cheer, these holiday cookies are as fun to make as they are to eat. Twisted into whimsical red-and-white candy canes, they bring instant joy to cookie platters, holiday tins, and cozy evenings by the Christmas tree. A recipe that’s equal parts nostalgia and magic.
Ingredients
-
1 cup unsalted butter, softened
-
1 cup powdered sugar, sifted
-
1 large egg, room temp
-
1 tsp vanilla extract
-
½ tsp peppermint extract
-
2 ½ cups all-purpose flour
-
½ tsp salt
-
Red gel food coloring (or beet paste for natural color)
-
Optional: Coarse sugar or sparkling sugar for garnish
Instructions
-
Cream base: Beat butter + powdered sugar until light and fluffy (2–3 min).
-
Add wet: Mix in egg, vanilla, and peppermint until smooth.
-
Add dry: Whisk flour + salt separately, then mix into wet until just combined.
-
Divide & color: Split dough in half. Tint one half red. Wrap both and chill 30 min.
-
Preheat: Oven to 350°F (175°C). Line baking sheets with parchment.
-
Shape: Roll 1 tsp of plain dough + 1 tsp of red dough into 4–5 inch ropes. Twist together, bend into candy cane shape. Place 2 inches apart on sheets.
-
Bake: 9–11 min until set (edges barely golden). Do not overbake.
-
Cool: Rest on sheet 5 min, then transfer to a wire rack. Garnish with sugar if desired.
Notes
-
Chocolate Drizzle: Add melted white chocolate + crushed candy canes.
-
Flavor Twist: Mix in a dash of cinnamon or nutmeg with the flour.
-
Grinch Style: Swap red for green food coloring.
-
Allergy-Friendly: Use gluten-free flour blend or dairy-free butter.
- Prep Time: 30 min
- Cook Time: 10 min
Nutritional Information*
Prep Time: 30 minutes | Chill Time: 30 minutes | Bake Time: 10 minutes | Servings: About 30 cookies
*This is an estimate provided for informational purposes only. I am not a nutritionist.
Approximate Per Cookie: Calories: 110 | Sugar: 6g | Fat: 6g | Carbohydrates: 12g | Protein: 1g
Final Thoughts: More Than Just a Cookie
As the last cookie cools on the rack and you survey your kitchen—dusted with a fine layer of powdered sugar and filled with the incredible scent of peppermint and butter—I hope you feel a deep sense of accomplishment and joy. You haven’t just baked a batch of cookies; you’ve crafted little edible symbols of the season, each twist telling a story.
These Candy Cane Cookies are a beautiful reminder of what makes holiday baking so special. It’s not about achieving impossible perfection. It’s about the warmth of the oven on a cold day, the laughter that comes with a slightly lopsided cane, and the love stirred into every single ingredient. It’s about carrying on traditions and creating new ones.


