

The Ultimate Pumpkin Cheesecake Bars: Your New Favorite Fall Dessert
Hello, my fellow flavor-chasers! Olivia here, waving at you from a kitchen that currently smells like a heavenly cross between a spice market and a Parisian patisserie. If you’ve landed here, I have a feeling you and I are kindred spirits. You’re probably dreaming of that perfect fall dessert—the one that’s not just a treat, but an experience. The kind of dish that makes people’s eyes light up, that sparks a chorus of “oh my goodness, you made this?” and has everyone sneaking back to the pan for just one more sliver.
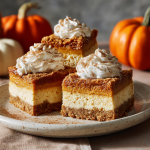
Well, my friend, you have found your dessert. These Ultimate Pumpkin Cheesecake Bars are my magnum opus of autumn baking. We’re talking a buttery, spiced graham cracker crust made with nutty browned butter, a layer of impossibly creamy, tangy cheesecake, and a gorgeous ribbon of spiced pumpkin puree running through it all. It’s bold in flavor, luxurious in texture, and designed to be shared (though I won’t judge if you keep the pan for yourself). This is a double-batch recipe because, honestly, a single batch of something this good just causes fights. And to top it all off? A cloud of cinnamon maple whipped cream that’s so good you might just eat it with a spoon. So, tie on your favorite apron—the messy one with all the character—and let’s make some magic.
A Slice of Autumn Nostalgia
This recipe always takes me right back to my first-ever Friendsgiving. I was so nervous! I wanted to bring something that said, “I’m a competent adult who can cook,” and not, “I bought this pie at the gas station.” My grandma’s classic pumpkin pie was a safe bet, but I wanted to put my own spin on it. I decided to merge it with my dad’s famous New York-style cheesecake. The result was… a delicious, but slightly cracked, mess. I overmixed, I didn’t let things come to room temp, and I definitely didn’t use a water bath! But you know what? It was the first dish to disappear. My friends raved about the flavor, and that cracked top just showed it was made with love. That little kitchen “fail” taught me that the goal isn’t perfection; it’s joy. This recipe is that original Frankenstein dessert, but refined over years of testing, with all my best chef hacks baked right in. It’s the taste of that first autumn adventure, but now with a lot more finesse (and way fewer cracks).
Gathering Your Cozy Ingredients
Here’s everything you’ll need to create this autumnal masterpiece. Remember, using room temperature dairy is the secret weapon for a silky-smooth, lump-free cheesecake batter! Don’t skip it.
For the Browned Butter Graham Cracker Crust:
- 6 cups graham cracker crumbs: You can buy these pre-crumbed or pulse whole crackers in a food processor. For a fun twist, try using ginger snaps or biscoff cookies!
- 2/3 cup brown sugar: Adds a deep molasses sweetness that pairs perfectly with the brown butter.
- 2 tsp ground cinnamon & 2 tsp ground nutmeg: We’re toasting the spices in the crust to wake up their essential oils and make the whole kitchen smell incredible.
- ½ tsp ground cloves: A little goes a long way! This provides a warm, intense depth.
- 1 cup (2 sticks) unsalted butter, browned: This is our elevated twist! Browning the butter gives the crust a nutty, almost toffee-like flavor that is absolutely next-level.
For the Luxurious Cheesecake Batter:
- 8 packages (8 oz each) cream cheese, room temperature: This is non-negotiable. Cold cream cheese will leave you with a lumpy batter. Full-fat is best for the creamiest texture.
- 3 cups granulated sugar: Seems like a lot, but it balances the tang of the cream cheese and sour cream perfectly.
- 4 tbsp cornstarch: Our secret stabilizer! It helps prevent cracking and gives the cheesecake a beautiful, firm-yet-creamy set.
- 8 large eggs, room temperature: Again, temperature is key! Cold eggs can re-solidify the fat in the cream cheese, leading to a chunky texture.
- 1 cup heavy whipping cream & 1½ cups sour cream, room temperature: The dynamic duo of richness and tang. The sour cream especially cuts through the sweetness for a perfectly balanced bite.
- 2 tsp vanilla extract: Use the real stuff! It makes a world of difference.
For the Spiced Pumpkin Layer:
- 2 cans (15 oz each) pumpkin purée: Not pumpkin pie filling! We’re adding our own spices. Canned is actually preferred here for its consistent texture and moisture content.
- 2 tsp ground cinnamon, 1 tsp ground nutmeg, 2 tsp pumpkin spice: The classic autumn flavor quartet. Feel free to adjust to your taste!
For the Cinnamon Maple Whipped Cream:
- 4 cups heavy whipping cream, cold: Must be cold to whip up properly into stiff peaks.
- ¾ cup granulated sugar: Sweetens the deal.
- 2 tbsp pure maple syrup: The second elevated twist! This adds a gorgeous, nuanced autumnal flavor you just can’t get from plain sugar.
- 2 tsp vanilla extract & 2 tsp ground cinnamon: Because we believe in flavor in every single component.
Let’s Bake! Your Step-by-Step Guide to Cheesecake Bliss
Follow these steps, and you’ll be a cheesecake bar hero. I’ve sprinkled in all my best tips to ensure your success.
Step 1: Prep Like a Pro. Preheat your oven to 325°F (160°C). This is a lower temperature than most baking, which is key for gently cooking the cheesecake without curdling it or causing cracks. Line a 9×13-inch pan (or two 9×9 pans) with parchment paper, leaving an overhang on two sides. This is your lifesaver for lifting the bars out later for clean slicing.
Step 2: Brown That Butter. In a light-colored saucepan (so you can see the color change!), melt the 2 sticks of butter over medium heat. It will foam, then crackle. Swirl the pan frequently and watch for little brown specks forming at the bottom and a warm, nutty aroma. This is the milk solids toasting! The second it smells like toasted nuts and turns golden, take it off the heat and pour it into a heatproof bowl to stop the cooking. Let it cool for a few minutes. Chef’s Hack: You can brown your butter a day ahead to save time!
Step 3: Create the Crust. In a large bowl, stir together the graham cracker crumbs, brown sugar, cinnamon, nutmeg, and cloves. Pour in the slightly cooled browned butter (including all those delicious toasted bits!) and mix until the mixture resembles wet sand and holds together when pinched. Dump it into your prepared pan and press it down firmly and evenly using the bottom of a measuring cup or glass. This compact layer is the foundation of your bars! Bake for 10 minutes, then let it cool completely on a wire rack.
Step 4: Master the Batter. In the bowl of a stand mixer fitted with a paddle attachment (or using a hand mixer), beat the room-temperature cream cheese on medium speed until it’s completely smooth and lump-free. Scrape down the bowl and beater. Add the sugar and cornstarch and beat until just combined. Now, with the mixer on low, add the eggs one at a time, mixing until each yolk just disappears into the batter. Overmixing at this stage incorporates too much air, which leads to cracking! Finally, gently mix in the heavy cream, sour cream, and vanilla until the batter is silky and homogenous. Don’t overdo it!
Step 5: Swirl in the Pumpkin. Pour slightly more than half of the cheesecake batter over the cooled crust. In a separate bowl, stir together the pumpkin puree and spices. Dollop this pumpkin mixture over the first layer of cheesecake batter. Pour the remaining cheesecake batter over the top. Now, take a knife or a skewer and gently swirl it through the layers to create a beautiful marbled effect. Don’t over-swirl, or you’ll muddle the colors!
Step 6: The Low and Slow Bake. Place the pan in the preheated oven. Bake for 55-65 minutes. The edges will be puffed and set, but the center will still have a slight jiggle—like Jell-O—when you gently shake the pan. This is perfect! It will continue to set as it cools. Chef’s Hack: For extra insurance against cracks, you can place a roasting pan of hot water on the rack below the cheesecake to create steam.
Step 7: The Patience Phase. This is the hardest part! Let the cheesecake cool completely at room temperature on a wire rack. Then, cover it and transfer it to the refrigerator to chill for at least 4 hours, but preferably overnight. This waiting time is non-negotiable for the perfect texture and clean slices.
Step 8: Whip the Topping. Just before serving, make the whipped cream. In a chilled bowl, beat the cold heavy cream, sugar, maple syrup, vanilla, and cinnamon on medium-high speed until stiff peaks form. Don’t walk away—it goes from soft to stiff quickly!
How to Serve These Beautiful Bars
Use the parchment paper overhang to lift the entire slab of cheesecake out of the pan and onto a cutting board. For pristine, clean cuts, wipe your sharp knife clean between each slice. I like to cut them into smaller squares—they’re rich! Plate them on a simple platter or individual dessert plates. Top each bar with a generous dollop (or a fancy piped swirl) of the cinnamon maple whipped cream. For a final flourish, a light dusting of cinnamon or a tiny grate of fresh nutmeg on top looks gorgeous and hints at the warm spices inside.
Make It Your Own: Delicious Variations
- Chocolate Drizzle: Melt some dark chocolate with a splash of cream and drizzle it over the chilled bars before adding whipped cream.
- Ginger Snap Crust: Swap the graham crackers for ginger snap crumbs for a spicy, zingy base.
- Pecan Praline Top: Sprinkle a layer of chopped pecans tossed with a little brown sugar and butter over the batter before baking for a crunchy topping.
- Gluten-Free: Use certified gluten-free graham crackers or gluten-free oat flour for the crust.
- Lighter Option: You can use reduced-fat cream cheese and sour cream, but remember the texture and richness will be slightly less decadent.
Olivia’s Chef Notes & Kitchen Stories
This recipe has been my autumn constant for years. I’ve made it for nervous potlucks, joyful celebrations, and even as a comforting treat on a rainy Tuesday. The browned butter addition came from a happy accident when I was making cookies and had some leftover. I thought, “Why not?” and it revolutionized the crust. The maple syrup in the whipped cream was my husband’s idea—he’s a Vermont native and insists on adding maple to everything. He was right, as usual!
The funniest thing that ever happened was the year I was so proud of myself for getting the marbling so perfect. I brought it to a party, and my friend’s toddler pointed at it and yelled, “Mudpie!” We all burst out laughing. But then he ate two whole pieces. So, whether it’s a work of art or a delicious mudpie, the result is the same: pure happiness.
Your Questions, Answered!
Q: My cheesecake batter is lumpy! What did I do wrong?
A: Almost certainly, your cream cheese, eggs, or dairy wasn’t truly at room temperature. Cold ingredients seize up when mixed. To fix it, you can try pressing the batter through a fine-mesh sieve, but prevention is the best medicine! Take everything out of the fridge at least 1-2 hours before you start.
Q: Why did my cheesecake crack?
A> The top three culprits are: 1) Overmixing the batter after adding the eggs (incorporates too much air), 2) A sudden temperature change (don’t open the oven door a lot!), and 3) Overbaking. Remember, we want a jiggly center! But hey, if it cracks, just cover it with a thick layer of that delicious whipped cream. No one will ever know.
Q: Can I freeze these bars?
A: Absolutely! They freeze beautifully. Chill completely, then slice. Wrap individual bars tightly in plastic wrap and place them in a freezer-safe bag or container. They’ll keep for up to 2 months. Thaw in the fridge overnight.
Q: Is there a way to make this without a stand mixer?
A: Of course! A sturdy hand mixer and a large bowl will work just fine. The key is just to ensure you’re beating the cream cheese until it’s completely smooth before moving on.
The Ultimate Pumpkin Cheesecake Bars
Description
A buttery, spiced graham cracker crust made with nutty browned butter, a creamy, tangy cheesecake layer, and a marbled ribbon of spiced pumpkin puree. Topped with cinnamon maple whipped cream, these bars are the ultimate fall dessert—rich, festive, and made for sharing.
Ingredients
For the Browned Butter Graham Cracker Crust:
-
6 cups graham cracker crumbs (or ginger snaps/Biscoff cookies)
-
2/3 cup brown sugar
-
2 tsp ground cinnamon
-
2 tsp ground nutmeg
-
½ tsp ground cloves
-
1 cup (2 sticks) unsalted butter, browned
For the Cheesecake Batter:
-
8 (8 oz) packages cream cheese, room temperature, full-fat
-
3 cups granulated sugar
-
4 tbsp cornstarch
-
8 large eggs, room temperature
-
1 cup heavy cream, room temperature
-
1½ cups sour cream, room temperature
-
2 tsp vanilla extract
For the Spiced Pumpkin Layer:
-
2 (15 oz) cans pumpkin purée (not pumpkin pie filling)
-
2 tsp ground cinnamon
-
1 tsp ground nutmeg
-
2 tsp pumpkin spice
For the Cinnamon Maple Whipped Cream:
-
4 cups heavy whipping cream, cold
-
¾ cup granulated sugar
-
2 tbsp pure maple syrup
-
2 tsp vanilla extract
-
2 tsp ground cinnamon
Instructions
Step 1: Prep & Preheat
-
Preheat oven to 325°F (160°C).
-
Line a 9×13-inch pan (or two 9×9 pans) with parchment paper, leaving overhang for easy removal.
Step 2: Brown the Butter
-
Melt butter over medium heat until golden brown with nutty aroma. Cool slightly.
Step 3: Make the Crust
-
Mix graham cracker crumbs, brown sugar, cinnamon, nutmeg, and cloves.
-
Add browned butter; mix until it holds together.
-
Press firmly into prepared pan. Bake 10 min; cool.
Step 4: Make the Cheesecake Batter
-
Beat cream cheese until smooth. Add sugar and cornstarch; mix gently.
-
Add eggs one at a time on low speed.
-
Fold in heavy cream, sour cream, and vanilla. Do not overmix.
Step 5: Layer & Swirl Pumpkin
-
Pour half the cheesecake batter over crust.
-
Mix pumpkin puree with spices; dollop over batter.
-
Pour remaining batter on top; gently swirl with a knife to marble.
Step 6: Bake Low & Slow
-
Bake 55–65 min. Edges set, center slightly jiggly. Optional: place a water-filled pan below to prevent cracks.
-
Cool completely, then refrigerate at least 4 hours (overnight preferred).
Step 7: Make the Whipped Cream
-
Beat cold heavy cream, sugar, maple syrup, vanilla, and cinnamon until stiff peaks form.
Notes
-
Room temperature dairy = smooth batter.
-
Avoid overmixing after eggs = prevents cracks.
-
Cracked tops? Cover with whipped cream—it’s forgiven!
-
Freezes well: wrap individual bars; keep up to 2 months.
Nutritional Information*
*This is an estimate per bar (based on 24 servings) and will vary based on specific ingredients used.
Approx. 350 calories | 5g protein | 28g carbs | 24g fat
Prep Time: 35 mins | Cook Time: 1 hour | Chill Time: 4+ hours | Serves: 24-30
Final Thoughts: Your New Autumn Signature Dish
And there you have it—the recipe that turns a simple autumn craving into a truly memorable dessert experience. These Ultimate Pumpkin Cheesecake Bars are the culmination of years of happy accidents, kitchen experiments, and the simple joy of sharing something delicious with people you love.
They might look like they came from a fancy bakery case, but you made them. You browned the butter. You swirled the pumpkin. You patiently waited for that perfect set. And now, you get to share that accomplishment.


