
Your Kitchen Passport to Tokyo’s Sweetest Street Snack
Hey there, friend! Come on in, pull up a stool, and let’s chat. You know that magical feeling when you bite into something so perfectly delicious it instantly transports you somewhere else? For me, that’s the first crispy, warm, sweet bite of a fresh taiyaki. If you’ve never had one, you are in for the most delightful treat. Imagine a warm, fish-shaped waffle, golden brown and slightly crisp on the outside, giving way to a soft, cakey interior that hugs a sweet, molten center. It’s the ultimate handheld comfort food, a staple at Japanese festivals, and honestly, a little pocket of joy.
I’m so excited to share this recipe with you today because it proves that you don’t need a fancy kitchen or years of training to create something truly special and authentic. With a simple batter and a few key tips, we’re going to bring the bustling, happy energy of a Tokyo street market right to your stovetop. This isn’t just cooking; it’s an experience. It’s about the laughter that comes from maybe overfilling the first one, the incredible aroma that fills your home, and the pure pride of serving something you made with your own two hands. So, tie on your favorite apron (the messy one with stories), and let’s make some memories together. Adventure awaits!
The Day I Fell in Love with a Fish
My love affair with taiyaki started not in Japan, but on a blustery, cold afternoon in my own city. I was wandering through a winter market, my fingers numb, when I saw a line snaking away from a tiny, steam-filled stall. The sign had a simple fish drawing on it. Intrigued, I joined the queue and was rewarded minutes later with a warm paper pouch containing my first taiyaki. It was almost too hot to hold, its golden scales perfectly defined. I took a cautious bite and was instantly smitten. The crispy exterior cracked to reveal a river of sweet, smooth red bean paste that warmed me from the inside out.
In that moment, I wasn’t just standing on a snowy street; I was transported. I could almost hear the sounds of a summer festival in Tokyo. It was more than a snack; it was a feeling of discovery, of simple, unadulterated joy. I must have gone back three times that season. That experience taught me that food is the most powerful souvenir—it doesn’t just remind you of a place, it takes you back there. And now, we get to create that same magic right here. How cool is that?
Gathering Your Taiyaki Toolkit
Part of the beauty of this recipe is its simplicity! These are likely pantry staples you already have. Let’s break them down.
- 1 cup all-purpose flour: The backbone of our batter. It gives the taiyaki its structure and that classic cakey texture. For a slightly lighter result, you can swap it 1:1 with cake flour.
- 1/2 tsp baking powder: Our little leavening hero! This is what gives the taiyaki its lift and airy interior, making it light instead of dense.
- 1 tbsp sugar: Just a touch to lightly sweeten the batter itself, making it the perfect canvas for our sweeter fillings.
- 1 egg: This acts as a binder, holding everything together, and adds richness to the batter. For a vegan option, a flax egg works wonderfully.
- 1/2 cup milk: The liquid that brings our batter together. Whole milk will give you the richest flavor, but any milk you have on hand—even dairy-free alternatives like oat or almond milk—will work perfectly.
- 1/4 cup water: This helps thin the batter to just the right consistency for pouring and creating those crisp edges.
- 1/2 tsp vanilla extract (optional): A chef’s secret! A dash of vanilla adds a lovely warm aroma that complements any filling you choose.
For the Filling: This is where you get to play! The classic is sweet red bean paste (anko), which you can find at any Asian grocery store. But don’t stop there! Custard cream, Nutella, chocolate chips, or even sweetened cream cheese are all absolutely fantastic. The world is your oyster… or should I say, your fish?
Crafting Your Golden Fish: A Step-by-Step Guide
Okay, team! Let’s get cooking. Read through these steps once before you start—it’s like reading the map before a road trip. It makes the journey so much smoother.
- Make the Batter: In a medium-sized bowl, whisk together your dry ingredients—the flour, baking powder, and sugar. Get them nice and acquainted with each other. In a separate bowl or large measuring jug, whisk the egg, milk, water, and vanilla (if using) until it’s one uniform, pale yellow liquid. Now, create a well in the center of your dry ingredients and pour the wet mixture in. Gently whisk everything together just until the batter is smooth and there are no more dry flour pockets. A few small lumps are totally okay! Overmixing is the enemy of a tender taiyaki. Let the batter rest for 10 minutes while you heat the pan. This allows the gluten to relax and gives us a better texture.
- Heat the Pan: This is the most important step! Place your taiyaki pan over medium heat and let it preheat thoroughly. I can’t stress this enough. A properly heated pan is what gives you that gorgeous, crispy, golden-brown exterior. To test if it’s ready, flick a few drops of water onto the surface—if they sizzle and dance, you’re good to go. Lightly grease both fish molds with a neutral oil (like vegetable or canola) using a pastry brush or a paper towel. You only need a very thin layer.
- Fill and Cook: Here’s the fun part! Give your rested batter a quick stir. Pour enough batter into one side of the mold to cover the bottom and slightly up the sides. This creates a “bed” for your filling. Now, add a generous spoonful of your chosen filling right in the center. Pro Tip: Don’t let the filling touch the edges of the mold, or it might leak out! Now, pour more batter over the top to completely encase the filling. Quickly close the lid and latch it if your pan has one.
- Flip and Finish: Cook for about 2-3 minutes on the first side. Peek carefully—if the edges look set and golden, it’s time to flip. This is the tricky dance! Use a firm, confident motion to flip the entire pan over. Cook for another 2-3 minutes on the second side until both sides are a beautiful, even golden brown. If your first one isn’t perfect, don’t worry! The first one is always the “chef’s treat” for a reason. You’ll get the hang of it.
- Release and Rest: Carefully open the pan. Use a chopstick or a small silicone spatula to gently loosen the edges and coax your beautiful golden fish out onto a wire rack. Let it cool for just a minute or two. I know it’s hard to wait, but that filling will be molten lava hot! This brief rest allows the structure to set slightly, making it less fragile and even more delicious.
How to Serve Your Masterpiece
Taiyaki is best served warm, right off the press, handed directly to a happy friend or family member. That’s the true authentic experience! For a more decadent treat, place it on a small plate and dust it with a little powdered sugar or drizzle with chocolate sauce. A scoop of vanilla ice cream on the side turns it into an incredible dessert. And of course, a hot cup of green tea or coffee is its perfect, timeless partner. The goal is to enjoy it while it’s still warm and the filling is blissfully gooey.
Let’s Get Creative: Taiyaki Variations
The basic recipe is a blank canvas! Here are a few ways to make it your own:
- Matcha Green Tea: Add 1-2 teaspoons of high-quality matcha powder to the dry ingredients for a beautiful green hue and earthy flavor. Pair it with white chocolate chips!
- Savory Surprise: Skip the sugar in the batter. Fill with shredded cheese, a little cooked sausage, or even a soft-boiled egg for a fantastic savory twist.
- Fruity Fun: Use a thick fruit jam or lemon curd as your filling. It’s bright, tangy, and absolutely delicious.
- Chocolate Lover’s Dream: Add a tablespoon of cocoa powder to the dry ingredients for a chocolate batter. Fill it with Nutella, peanut butter, or chopped strawberries.
- Gluten-Free Friendly: Use a 1:1 gluten-free all-purpose flour blend. The texture might be slightly different, but it will still be delicious!
Olivia’s Chef Notes & Kitchen Stories
This recipe has seen a lot of love (and a few kitchen disasters!) in my home. My first attempt was… a learning experience. I overfilled it so much that red bean paste oozed out everywhere, sealing the pan shut and creating a hilarious, lopsided fish-monster. We still ate it and it was delicious, but it taught me the importance of not being too generous with the filling. My other big lesson? Patience with the heat. I used to crank it to high, eager for a quick result, and would end up with a dark outside and a raw inside. Medium heat is your best friend here—it cooks it through perfectly.
Over time, this recipe has become a weekend ritual. My friends know that if they stop by on a Sunday afternoon, they’ll likely be greeted with the smell of vanilla and baking batter and be handed a warm taiyaki. It’s a recipe that’s meant to be shared, messed up, perfected, and loved. Don’t strive for perfection on the first try. Strive for fun. The perfect-looking fish will come with practice, but the joy starts with the very first one.
Your Taiyaki Questions, Answered!
Q: My filling keeps leaking out! What am I doing wrong?
A: Ah, the classic taiyaki rite of passage! This usually happens for one of two reasons: too much filling, or the filling is touching the edges of the mold. Make sure you create a good batter “seal” underneath and on top of your filling, and keep that filling blob right in the center. A little leakage is okay and honestly, those crispy bits are a cook’s treat!
Q: I don’t have a taiyaki pan. Can I still make these?
A: While the fish shape is iconic, you can absolutely still enjoy the spirit of the recipe! You can use a regular waffle iron to make “taiyaki-inspired” waffles. Just pour in some batter, dollop on your filling, and add a bit more batter on top before closing the lid. You won’t get the fish shape, but you’ll get all the delicious flavor and fun.
Q: My batter is sticking to the pan. How can I prevent this?
A: Sticking usually means the pan wasn’t hot enough or well-greased enough. Make sure you preheat the pan properly on medium heat and use a pastry brush to get oil into all the little scale crevices. Non-stick spray works too, but a brush gives you more control.
Q: Can I make the batter ahead of time?
A: You can! Whisk it together, cover it tightly, and store it in the refrigerator for up to 24 hours. You might need to give it a quick stir and potentially add a tiny splash of milk or water if it has thickened up too much while resting.

Authentic Japanese Taiyaki
Description
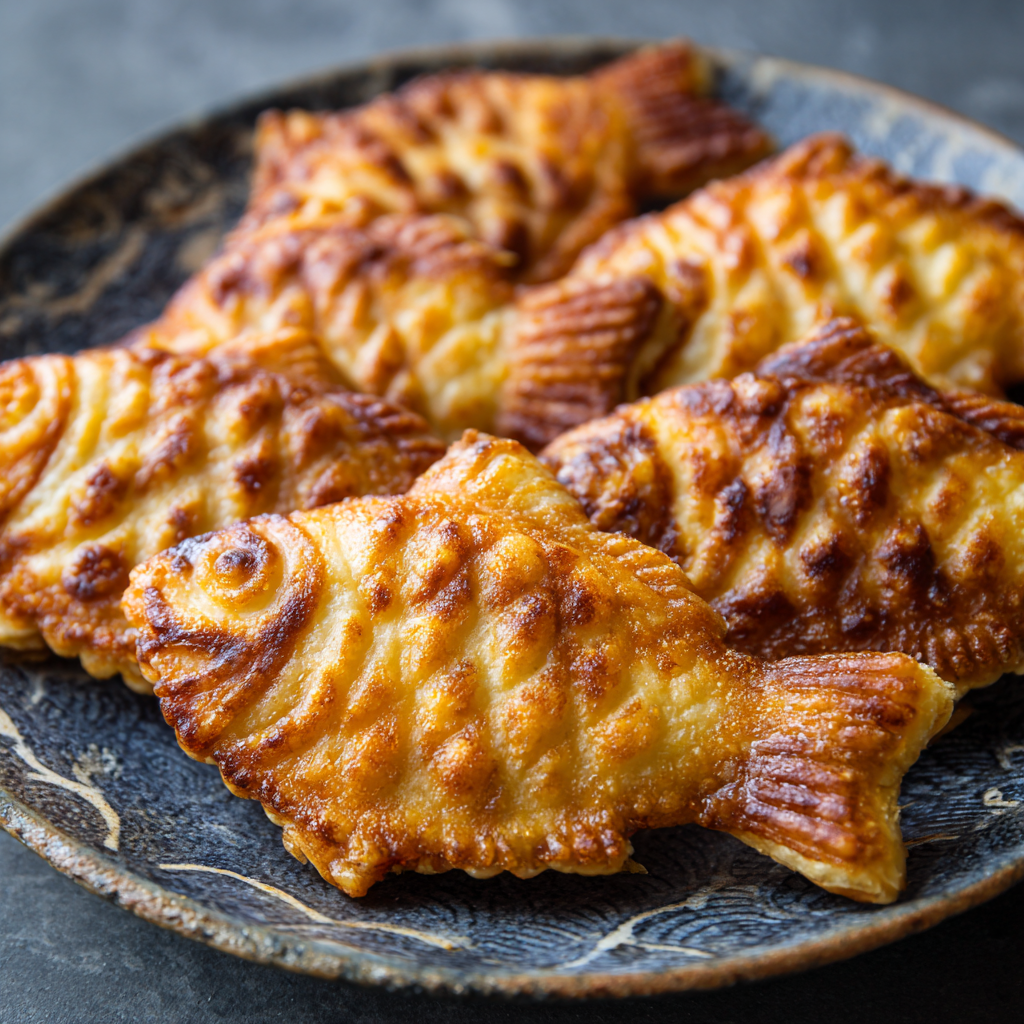
A golden, crispy fish-shaped cake with a soft, cakey interior and a molten sweet center. Perfect for weekends, desserts, or anytime you need a handheld joy boost!
Ingredients
Batter
-
1 cup all-purpose flour (or cake flour for lighter texture)
-
½ tsp baking powder
-
1 tbsp sugar
-
1 egg (or flax egg for vegan)
-
½ cup milk (any kind)
-
¼ cup water
-
½ tsp vanilla extract (optional)
Filling (choose one or mix!)
-
Sweet red bean paste (classic anko)
-
Custard cream
-
Nutella, chocolate chips, or sweetened cream cheese
Optional Flavor Tweaks
-
Matcha powder (1–2 tsp) for green tea flavor
-
Cocoa powder (1 tbsp) for chocolate batter
Instructions
-
Make the Batter:
-
Whisk together flour, baking powder, and sugar.
-
In another bowl, whisk egg, milk, water, and vanilla until uniform.
-
Pour wet into dry ingredients and mix gently until smooth (small lumps are fine).
-
Let batter rest 10 min.
-
-
Preheat the Pan:
-
Heat the taiyaki pan over medium heat.
-
Test with a few drops of water—they should sizzle.
-
Lightly brush both molds with oil.
-
-
Fill & Cook:
-
Pour enough batter into one side of the mold to cover bottom and sides.
-
Add a spoonful of filling in the center (keep away from edges).
-
Pour more batter on top to seal the filling.
-
Close pan, cook 2–3 min, then flip and cook another 2–3 min until golden brown.
-
-
Release & Rest:
-
Carefully remove taiyaki using chopsticks or spatula.
-
Cool 1–2 minutes to let the filling set slightly.
-
Notes
-
Filling leaks: Use less filling and keep it centered.
-
No taiyaki pan? Use a waffle iron—pour batter, add filling, top with more batter.
-
Batter sticking: Make sure pan is hot and lightly greased, including crevices.
-
Prep ahead: Batter can be refrigerated up to 24 hours. Stir and add a splash of milk/water if thickened.
Nutritional Information*
*Estimated values per taiyaki with red bean paste filling.
Calories: ~180 | Protein: 5g | Carbohydrates: 28g | Fat: 5g
Final Thoughts: Your Passport, Stamped
And there you have it—your very own ticket to one of Tokyo’s most beloved street food experiences, no long-haul flight required.
Remember, this journey wasn’t just about recreating a snack; it was about capturing a feeling. That first bite of your homemade taiyaki, with its warm, golden shell and sweet, heartwarming center, is more than just delicious—it’s a triumph. It’s proof that your kitchen is a gateway to any corner of the world you wish to explore.


