
The Ultimate Game Day (Or Any Day) Snack: Crispy Japanese Chicken Wings
Hey there, friend! Come on in, grab an apron, and get ready to make your kitchen smell absolutely incredible. If you’ve ever found yourself dreaming about that perfect, crackly-crispy chicken wing—you know, the kind that shatters when you bite into it, giving way to juicy, tender meat that’s coated in a glossy, sticky, sweet-salty glaze—then you and I are about to become besties.
Today, we’re making my all-time favorite party hero: Crispy Japanese Chicken Wings. These aren’t just any wings. They’re my take on the legendary Tebasaki wings from Nagoya, Japan, and they are a total flavor explosion. We’re talking about a one-two punch of serious texture and umami-rich flavor that will have everyone hovering around the tray, fingers poised, waiting for the okay to dive in.
The best part? You absolutely do not need to be a professional chef to nail these. Whether you’re an air-fryer aficionado, an oven-baking master, or you go all-in with a pot of oil (no judgment here, it’s a glorious path!), I’ve got you covered with all the methods. This recipe is all about building confidence, having fun, and creating something seriously delicious that brings people together. So, let’s turn up the music, preheat that appliance of choice, and make some magic happen.
A Wing and a Prayer: My First Taste of Tebasaki
I’ll never forget the first time I truly experienced these wings. It wasn’t in a fancy restaurant or on a trip to Japan (a girl can dream!). It was in a cramped, steam-filled, hole-in-the-wall izakaya (a Japanese pub) tucked away in a side street in my city. I was with a group of friends, and we were packed around a tiny table, shouting over the lively chatter and clinking glasses.
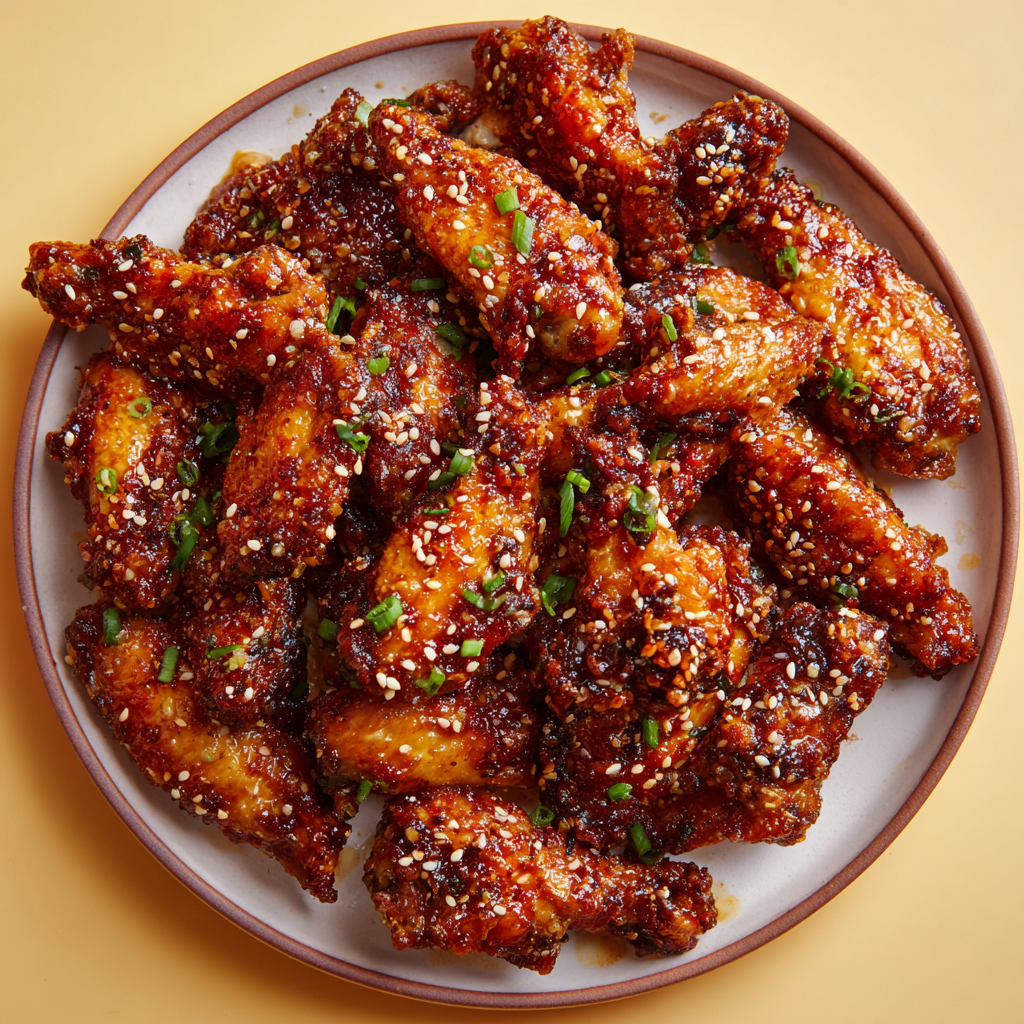
A seasoned foodie friend, without even looking at the menu, just held up two fingers to the server and said, “Tebasaki, please.” When the plate arrived, they didn’t look like the saucy, messy wings I was used to. They were a beautiful, burnished bronze, glistening under the dim lights, with just a few sesame seeds clinging to their surface. The first bite was a revelation. The skin was impossibly crisp, like a delicate glass shell, and the glaze was this perfect, complex balance of savory, sweet, and a subtle kick of heat. We devoured them in minutes, licking our fingers and immediately ordering another round. It was one of those perfect food moments—simple, shared, and utterly unforgettable. That night, I knew I had to learn how to recreate that magic in my own kitchen, and after many (many!) delicious attempts, I’m so excited to share my version with you.
Gathering Your Flavor Arsenal
Part of the beauty of this recipe is its simplicity. The ingredient list is short and sweet (and savory!), but each one plays a starring role. Here’s what you’ll need:
- 1 lb (450g) chicken wings, split into drumettes and flats – Patting them completely dry with paper towels is your first and most crucial step to achieving maximum crispiness. Water is the enemy of crunch!
- Salt & pepper to taste – The foundational seasonings. Don’t be shy here; it seasons the meat itself.
- 1/2 cup cornstarch or potato starch – This is the SECRET WEAPON! Using starch instead of flour creates a much lighter, crispier, and almost glass-like crust that holds onto the glaze beautifully. Chef’s Insight: I slightly prefer potato starch for an even crispier, airier texture, but cornstarch works fantastically and is more common.
- Oil for frying or high-heat cooking spray – For frying: a neutral oil with a high smoke point like canola, vegetable, or peanut oil. For baking/air frying: a quick spritz of avocado or olive oil spray will help them brown.
For The Legendary Glaze:
- 2 tbsp soy sauce – Use regular soy sauce, not low-sodium, for the right balance of saltiness. For a gluten-free option, tamari is a perfect 1:1 swap.
- 2 tbsp mirin – This sweet Japanese rice wine adds a gentle sweetness and beautiful gloss. Substitution Tip: If you can’t find it, a mix of 2 tbsp white wine or sherry with ½ tsp of sugar is a decent stand-in.
- 1 tbsp sake – This adds depth and helps balance the sweetness. Don’t worry, the alcohol cooks off! Substitution Tip: You can use dry sherry or even just skip it and add an extra tbsp of mirin or a tiny splash of water.
- 1 tbsp sugar – White granulated sugar is perfect. It caramelizes with the soy to create that sticky, glossy finish we’re after.
- 1 clove garlic, grated – Grating it ensures its flavor melds seamlessly into the glaze without any sharp, raw bites.
- 1 tsp grated ginger – Fresh is best! It adds a bright, warming zing that is essential.
- Optional garnishes: sesame seeds, chopped green onions, chili flakes – These aren’t just for looks! They add texture, freshness, and a pop of color.
Let’s Get Cooking: Your Path to Crispy Perfection
Okay, team! Aprons on? Let’s do this. Follow these steps, and you’ll be a wing wizard in no time.
- Prep Your Wings: First things first, take your split chicken wings and lay them out on a big stack of paper towels. Pat them down thoroughly—I mean, really get in there. You want the skin to be as dry as the desert. This is the single most important step for crispy skin, no matter which cooking method you choose. Transfer them to a bowl, season generously with salt and pepper, and toss to coat evenly.
- Coat Like a Pro: Sprinkle your cornstarch or potato starch over the wings. Now, here’s a little chef hack: toss them with your hands, making sure every nook and cranny is lightly coated. It should feel like a very light, dusty snow has fallen on them. You don’t want a thick, pasty coating. Place the coated wings on a wire rack while you heat your oil or preheat your oven/air fryer. This lets any excess starch fall off and helps the skin dry out even further.
- Choose Your Cooking Adventure:
- For Deep Frying (The Classic Crispy Route): Pour oil into a heavy-bottomed pot or Dutch oven until it’s about 2 inches deep. Heat it to 350°F (175°C). Use a thermometer! This ensures perfect results. Carefully lower the wings in batches—don’t crowd the pot!—and fry for 8-10 minutes, until they are golden brown, crispy, and cooked through. Let them drain on a fresh wire rack set over a baking sheet. Tip: The wire rack keeps them crispy on all sides; a paper towel-lined plate can make the bottom steam and get soggy.
- For Air Frying (The Healthier Hero): Preheat your air fryer to 400°F (200°C). Arrange the wings in a single layer in the basket—give them some space for the air to circulate! Cook for 20-25 minutes, flipping them halfway through. You’ll know they’re done when the skin is golden and crackly.
- For Baking (The Hands-Off Approach): Preheat your oven to 425°F (220°C). Place a wire rack on a baking sheet (this is non-negotiable for airflow!) and arrange the wings on it. Give them a light spritz with oil spray. Bake for 30-35 minutes, flipping once halfway through, until deeply golden and crispy.
- Make the Magic Glaze: While the wings are cooking, combine all your glaze ingredients—soy sauce, mirin, sake, sugar, grated garlic, and grated ginger—in a small saucepan. Bring it to a gentle simmer over medium heat, stirring until the sugar dissolves. Let it bubble away for 2-3 minutes until it thickens slightly enough to coat the back of a spoon. Chef’s Commentary: It will thicken more as it cools, so don’t over-reduce it into a syrup! Remove it from the heat.
- The Grand Finale: Toss and Serve! As soon as your wings are out of the fryer/oven/air fryer and are still piping hot, place them in a large bowl. Pour about half of your warm glaze over them and toss gently to coat. I like to add a little glaze at a time because you can always add more, but you can’t take it away! You want them beautifully glazed, not swimming. Once they’re dressed to impress, transfer them to a serving platter, sprinkle with your garnishes, and serve immediately. Trust me, they won’t last long!
How to Serve These Shiny Gems
Presentation is part of the fun! I love serving these wings piled high on a big rustic wooden board or a beautiful vibrant platter. Scatter those garnishes generously—the bright green of the scallions and the white and black of the sesame seeds make them look like they came from a professional kitchen. Have plenty of napkins ready (these are gloriously messy!) and maybe even a little bowl of extra glaze on the side for the true enthusiasts. They’re perfect as the main event for a cozy night in with a movie, or as the star of the show on a party spread next to some cool, crunchy veggie sticks and a creamy dip.
Make It Your Own: Delicious Twists & Swaps
The beauty of this base recipe is how adaptable it is! Feel like mixing it up? Here are a few of my favorite riffs:
- Spicy Mango: Add 2 tbsp of mango chutney and a big pinch of chili flakes or a squirt of sriracha to the glaze for a sweet-and-spicy tropical vibe.
- Citrus Ginger: Add the zest and juice of half a lime or a small orange to the glaze for a super fresh, zingy kick.
- Honey Sriracha: Swap the sugar for 1.5 tbsp of honey and add 1-2 tbsp of sriracha to the glaze ingredients. A crowd-pleasing classic!
- Gluten-Free: As mentioned, simply ensure you use tamari instead of soy sauce. The rest of the recipe is naturally GF!
- Extra Garlicky: Double the garlic. Because… garlic.
From My Kitchen to Yours: A Few Parting Thoughts
This recipe has evolved so much since I first started making it. I’ve had my fair share of kitchen mishaps—like the time I thought “a bit more glaze” was a good idea and created a caramelized wing-ice hockey puck situation. Or the time I didn’t pat the wings dry and ended up with steamed chicken instead of fried. We live and we learn!
Over time, I’ve learned that the simplicity of the glaze is its power. Let those core Japanese flavors—soy, mirin, ginger, garlic—sing together without too much interference. They know what they’re doing. This dish has become my go-to for every gathering, from big game day parties to a simple “I deserve a treat” Tuesday. I hope it finds a special place in your recipe rotation, too, and creates its own delicious memories for you and your loved ones.
Your Questions, Answered!
Q: Can I make these ahead of time?
A: You can prep ahead! Coat the wings in starch and keep them on a rack in the fridge for up to 4 hours before cooking—this actually helps them get even crispier. You can also make the glaze a day or two ahead and store it in the fridge. Re-warm it gently before tossing. I don’t recommend glazing the wings ahead of time, as the moisture will make the crispy skin soft.
Q: My glaze isn’t sticky and is too thin. What happened?
A: This usually means it didn’t simmer for long enough. The sugar needs a little time to dissolve and meld with the other liquids. Let it simmer gently for a full 2-3 minutes. Remember, it will continue to thicken as it cools. If it’s still too thin after cooling, you can put it back on the heat for another minute or two.
Q: Why did my wings turn out soggy?
A: The number one culprit is not drying the wings thoroughly before coating them. Water = steam = soggy skin. The second culprit is overcrowding the pan while cooking, whether frying, air frying, or baking. The wings need space for moisture to evaporate so they can crisp up. Finally, if you’re baking, not using a wire rack means the wings are sitting in their own rendered fat, which will steam the bottom and prevent crisping.
Q: Can I use an entire pack of whole chicken wings?
A: Absolutely! This recipe is easily doubled or tripled. Just make sure you don’t overcrowd your cooking vessel—cook in batches if you need to. A crowded fryer or oven is a sad, steamy place for a chicken wing.

Crispy Japanese Chicken Wings
Description
Game day, movie night, or just because—you don’t need a reason to treat yourself to these wings. Inspired by Nagoya’s famous Tebasaki, these beauties are all about that shatter-crisp skin, juicy meat, and a glossy, sweet-savory glaze that clings like velvet. Whether you fry, bake, or air-fry, they’ll have everyone reaching for seconds (and thirds). Grab your napkins and get ready for wing perfection!
Ingredients
-
1 lb (450g) chicken wings, split into flats & drumettes
-
Salt & pepper, to taste
-
½ cup cornstarch or potato starch
-
Oil for frying OR cooking spray
For the Glaze
-
2 tbsp soy sauce (or tamari for GF)
-
2 tbsp mirin (or white wine + ½ tsp sugar)
-
1 tbsp sake (or extra mirin)
-
1 tbsp sugar
-
1 clove garlic, grated
-
1 tsp fresh ginger, grated
Optional Garnishes
Sesame seeds, green onions, chili flakes
Instructions
-
Prep Wings: Pat wings very dry with paper towels. Season with salt & pepper.
-
Coat: Lightly toss wings in starch until dusted evenly. Shake off excess.
-
Cook Your Way:
-
Deep Fry: 350°F oil, fry in batches 8–10 min until golden & crisp.
-
Air Fry: 400°F, cook 20–25 min, flip halfway.
-
Bake: 425°F, wire rack on baking sheet, bake 30–35 min, flipping once.
-
-
Make Glaze: In a small saucepan, simmer glaze ingredients 2–3 min until slightly thickened.
-
Toss & Finish: Coat hot wings with glaze, garnish, and serve immediately.
Notes
-
Extra Crispy Hack: Coat wings and chill on a rack in the fridge for up to 4 hrs before cooking.
-
Flavor Boosts: Try honey sriracha, citrus zest, or a garlicky double punch.
-
Batch-Friendly: Easily double or triple—just don’t crowd your cooking pan!
Nutritional Information*
*This is an estimate for 5 air-fried wings (including glaze) and is provided for informational purposes only. Actual values will vary based on cooking method, specific ingredients used, and portion size.
Calories: ~300 | Protein: 20g | Carbohydrates: 15g | Fat: 18g
Prep Time: 10 min | Cook Time: 25–35 min | Servings: 2–3
Final Thoughts: Your New Go-To Recipe Awaits
So there you have it—your ticket to snack-time glory. These Crispy Japanese Chicken Wings are more than just a recipe; they’re a experience. They’re about the satisfying crunch, the sticky-sweet glaze, and the pure joy of sharing something you made with your own hands with people you love.
Remember, the journey to perfect wings is a delicious one. Don’t stress if your first batch isn’t exactly like the one from that tiny izakaya. Cooking is an adventure. Embrace the mess, learn from each batch, and most importantly, have fun with it. You now have all the tools, tips, and tricks you need to create something truly spectacular.


