
Mason Jar Lid Pies: Your New Favorite Bite-Sized Joy!
Hey there, pie lovers! Olivia here, apron slightly dusted with flour and heart full of excitement because today? We’re turning humble mason jar lids into pure magic. Imagine golden, flaky crusts hugging sweet, bubbly berries—all in a palm-sized package that screams “eat me!” These adorable Mason Jar Lid Pies aren’t just desserts; they’re instant mood-lifters, conversation starters, and the ultimate “I-made-this” flex. Perfect for summer picnics, holiday cookie swaps, or just because Tuesday deserves something special. No fancy pastry degree required—just your favorite canned fruit, some trusty pie crust, and that spark of joy you get when creating something delightful. I promise, the hardest part is waiting for them to cool before you devour one (or three!). So grab your rings and lids, preheat that oven, and let’s bake some happiness!
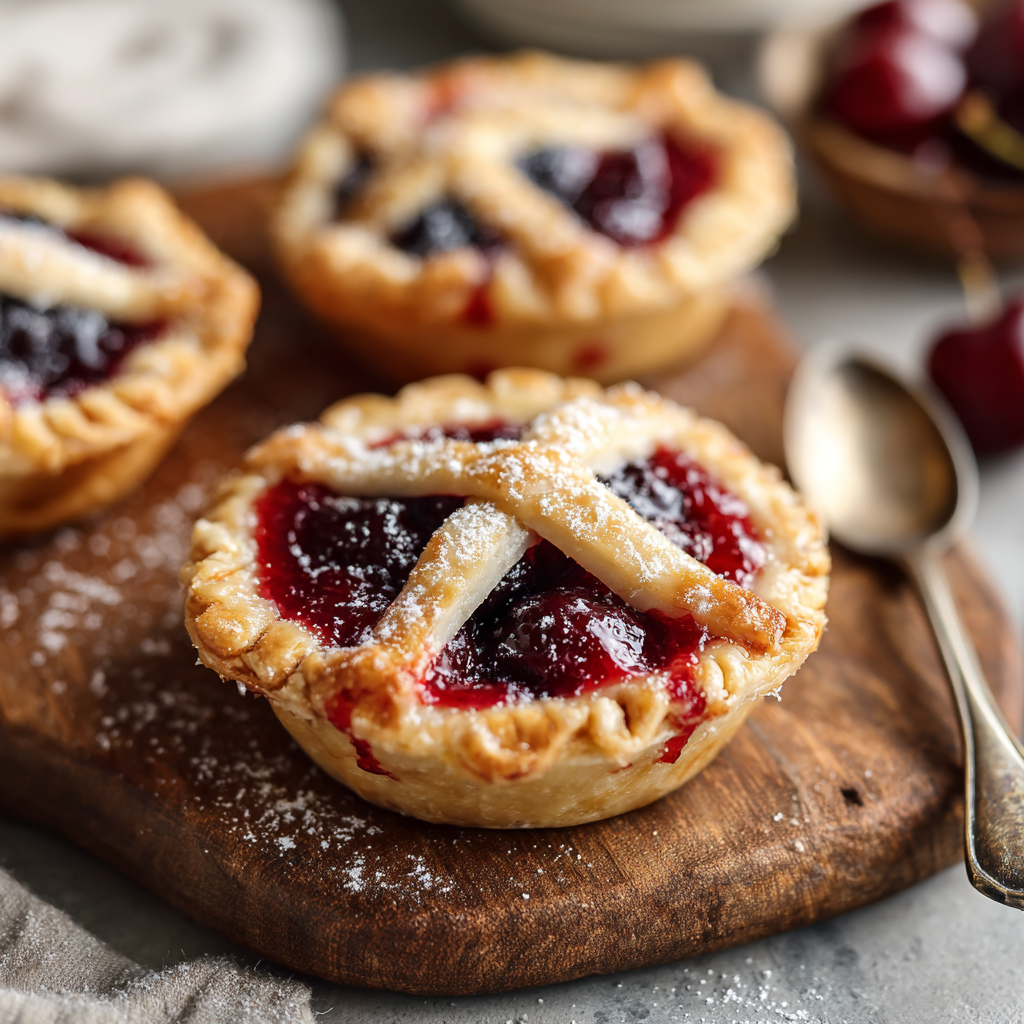
What makes these little gems so special? They capture everything we love about pie—the buttery crust, the luscious filling, the satisfying crunch of sugar on top—but ditch the commitment of slicing a whole pie. They’re portion-controlled (in theory!), endlessly customizable, and ridiculously charming. Picture them lined up on a wooden board at a potluck, tucked into lunchboxes as a sweet surprise, or served warm with a scoop of vanilla ice cream melting into the center. They’re proof that big flavor comes in small packages, and they’re about to become your go-to treat for making ordinary moments feel extraordinary. Ready to bake memories? Let’s go!
Nana’s Thrift Shop Treasure & My Pie Epiphany
This recipe takes me straight back to my Nana’s sun-drenched kitchen, circa age 10. She was the queen of “making do,” turning everyday bits into something wonderful. One summer afternoon, she unearthed a box of mismatched mason jar lids from a thrift shop haul. “Watch this, Livvy-girl,” she’d winked, her eyes sparkling like she’d found pirate gold. We whipped up a quick berry compote from jammy backyard blackberries, rolled out her lard pastry (scraps never went to waste!), and pressed those lids into service. I remember the sheer wonder as these tiny, golden pies emerged from her ancient oven—miniature masterpieces! We ate them warm, perched on her porch swing, purple juice staining our fingers and grins stretching ear-to-ear. It wasn’t just pie; it was pure, sticky-fingered magic born from resourcefulness and love.
That afternoon taught me kitchen alchemy isn’t about expensive tools, but imagination and heart. Nana’s thrift shop lids became vessels for joy, transforming simple berries and pastry into core memories. Every time I make these now, I smell her rosewater hand cream and hear her chuckle. It’s my little tribute to her genius—proof that the most delightful creations often spring from the simplest, most unexpected places. Now, I get to share that magic with you!
Gather Your Pie-Making Posse
Here’s your cheerful crew of ingredients! Don’t stress about perfection—flexibility is key in my kitchen. Pro tip: Set everything out before you start (mise en place!) for a smooth, joyful baking session.
- 12 regular-sized mason jar lids and rings: The stars of the show! Use standard wide-mouth lids (like Ball or Kerr). Chef’s Insight: Wash and dry them well! Placing the flat lid piece upside-down inside the ring creates the perfect mini pie tin. Genius, right?
- 2 (14.5 oz) cans berries in light syrup (cherries, blueberries, blackberries, etc.): The easy, juicy heart of the pie! Light syrup keeps sweetness balanced. Substitution Tip: No cans? Use 3 cups fresh/frozen berries + 1/4 cup water + extra tbsp cornstarch. Mix and match berries for fun!
- ½ cup granulated sugar: Sweetens and enhances the fruit’s natural flavor. Chef’s Insight: Taste your berries! If they’re tart (like cherries), use the full ½ cup. Sweeter berries (blueberries)? Try 1/3 cup. You’re the boss!
- 3–4 tbsp cornstarch: Our thickener hero! Prevents a juicy flood. Substitution Tip: Use 4-5 tbsp flour for a more opaque filling, or tapioca starch 1:1 for glossier results.
- 1 (14 oz) box refrigerated pie crust (2 crusts): The flaky hug for our filling! Lifesaver for busy days. Chef’s Hack: Let it sit at room temp 15 mins before unrolling—prevents cracks! Feeling ambitious? Use my favorite butter crust recipe.
- 1 egg, well-beaten: Gives the crust that gorgeous, golden shine. Substitution Tip: Brush with heavy cream or melted butter in a pinch.
- Turbinado sugar, for sprinkling: That irresistible crunch and sparkle! Chef’s Insight: Its coarse crystals won’t melt away like granulated sugar. Regular sugar works, but turbinado is ✨magic✨.
Let’s Build Some Mini Masterpieces!
Okay, team! Time to transform these bits into edible joy. Channel your inner pie artist—it’s easier than you think. I’ve packed each step with my favorite hacks to ensure success!
- Preheat & Prep: Fire up your oven to 375°F (190°C). Line a sturdy baking sheet with parchment paper. Why? This catches any rogue berry bubbles and makes cleanup a dream! Trust me, scrubbing baked-on syrup is no one’s idea of fun. Chef’s Hack: Place your oven rack in the middle position for even baking.
- Berry Bliss Simmer: Grab a medium saucepan. Dump in the berries (including about 3/4 cup of that lovely syrup!), sugar, and cornstarch (start with 3 tbsp). Whisk it well over medium heat. Bring it to a gentle simmer, stirring constantly—those berries are eager to thicken! Cook for 5-8 minutes until gloriously thick and glossy. Pro Tip: If it looks too thin after 5 mins, whisk in the extra tbsp cornstarch dissolved in 1 tsp cold water. Remove from heat and let it cool slightly (10 mins). Hot filling = soggy bottom crusts. Patience, grasshopper!
- Lid Assembly Line: Separate all your lids and rings. Here’s the fun trick: Place the flat lid piece upside-down inside each ring, pressing down gently. Voila! Instant mini pie tin. Line them up on your parchment-lined sheet. Chef’s Note: Feeling fancy? Give the “tins” a quick spritz of cooking spray for extra-easy release later.
- Crust Foundations: Unroll one pie crust on a lightly floured surface. Find a glass or round cutter slightly larger than your lid (about 4 inches works). Cut out 12 circles, re-rolling scraps as needed. Gently press a circle into each prepared lid/ring, forming a snug base. Don’t stretch the dough—just coax it in. Hack Attack: Use the ring itself as a guide! Place it on the dough and cut just outside it.
- Fill ‘Er Up & Top It Off: Spoon that gorgeous, slightly cooled berry filling into each crust-lined lid—aim for heaping tablespoons, but leave a small rim (about 1/4 inch) bare. Now, tops! You can cut circles for full lids (vent the top with a knife slit!), or get creative with lattice strips (cut the 2nd crust into 1/4-inch strips and weave). Press the edges firmly to seal the top crust to the bottom. Crimp beautifully with a fork. Chef’s Joy: This is your moment! Wonky crimps = rustic charm.
- Shine & Sparkle: Brush the tops (not the crimped edges) generously with your beaten egg. This is the secret to that deep golden glow! Immediately sprinkle liberally with turbinado sugar. Pro Tip: Do this step right before baking so the sugar doesn’t dissolve.
- Bake to Golden Perfection: Slide that baking sheet into your preheated oven. Bake for 20-25 minutes. You’re waiting for two things: deep golden-brown crust and visible bubbly fruit peeking through any vents. Watch Closely: Ovens vary! If the edges brown too fast, tent loosely with foil. That heavenly smell? That’s your cue!
- Cool & Release: This is CRUCIAL! Let the pies cool on the sheet for at least 15-20 minutes. They need to set. Then, gently run a small knife around the inner edge of the ring. Carefully lift the ring off. The pie, nestled on the flat lid piece, should pop out easily. Chef’s Lifesaver: If one sticks? Slide the knife under the lid to loosen. Serve warm or room temp. Resist eating immediately—that filling is lava!
Show Off Your Sweet Creations!
Presentation is half the fun with these cuties! Let your personality shine. For a rustic vibe, serve them right on their little lid “plates” nestled on a wooden board or vintage tray. Feeling fancy? Gently transfer them to mini parchment squares or dainty dessert plates. The ultimate indulgence? Place a warm pie in a small bowl and top it with a melting scoop of vanilla bean ice cream or a dollop of fresh whipped cream. A tiny mint leaf adds a pop of color! These pies are perfect for grab-and-go—pack them in small cupcake liners for picnics or lunchboxes. However you serve them, get ready for delighted squeals!
Make Them Uniquely Yours!
The beauty of these pies? Endless possibilities! Swap the filling and toppings to match your mood or pantry:
- Apple Cinnamon Hug: Swap berries for 2 cans apple pie filling + 1 tsp cinnamon + pinch of nutmeg. Top with streusel (mix 1/4 cup flour, 2 tbsp brown sugar, 1 tbsp oats, 2 tbsp cold butter) instead of a crust lid.
- Peach Melba Dream: Use canned peaches + 1 cup raspberries (fresh/frozen) + 1 tbsp lemon juice. Top with sliced almonds before baking.
- Savory Surprise: Skip the sugar! Fill with herbed chicken pot pie mix or cheesy spinach & feta. Use only a bottom crust or a full lid. Brush with garlic butter!
- Gluten-Free & Vegan: Use GF pie crust. Thicken filling with 4 tbsp tapioca starch. Swap egg wash for melted coconut oil or almond milk. Ensure sugar is vegan.
- Chocolate-Berry Bliss: Add 1/4 cup mini chocolate chips to the berry filling before baking. Divine!
Olivia’s Pie-Perfect Musings
Oh, these little pies! They’ve evolved from Nana’s thrift-shop experiment to my most-requested party trick. I’ve learned a thing or two: Always make extra filling—someone (usually me) will “taste test” half of it. Using the upside-down lid? Pure accident one frantic Thanksgiving when I ran out of muffin tins! Best happy accident ever. My biggest blooper? Forgetting the cornstarch once. Let’s just say I served “berry soup in crust boats.” Not my finest hour! Now I keep extras handy. Over the years, I’ve embraced the imperfections—a lopsided crimp, a lattice strip rebellion, a sugar avalanche. That’s homemade charm! These pies remind me that cooking isn’t about rigid rules; it’s about joyful experimentation and sharing deliciousness. So laugh if one leaks, high-five when they’re perfect, and savor every bite.
Your Pie Queries, Solved!
Let’s tackle those common kitchen head-scratchers:
- Q: Help! My filling leaked everywhere in the oven. Disaster?
A: Deep breath! Leaks happen, especially with super-juicy berries. It’s usually because: 1) Filling was too hot when added (cool it!), 2) The top crust wasn’t sealed well enough (press that edge firmly!), 3) Overfilling (leave that 1/4-inch rim!). Fix: Place a second baking sheet under your pie sheet to catch drips. Leaky pies still taste amazing—call them “rustic”! - Q: My crust is soggy on the bottom. What went wrong?
A> Soggy bottoms break my heart! Causes: 1) Adding hot filling (always cool it first!), 2) Underbaking (ensure golden color underneath—use a flashlight!), 3) Not enough thickener. Fix: Next time, try brushing the *unbaked* bottom crust with a thin layer of beaten egg white before adding filling—it creates a moisture barrier. Genius hack! - Q: Can I make these ahead of time? How do I store them?
A: Absolutely! Bake them completely, cool fully, then store UNassembled from the lids. Place pies (out of the rings/lids) in a single layer in an airtight container. Room temp: 1 day. Fridge: Up to 3 days. Freezer: Freeze baked pies solid on a sheet, then transfer to a bag for up to 2 months! Reheat thawed pies at 300°F for 10 mins. Do NOT store assembled in the rings—they’ll get soggy. - Q: Can I use homemade pie crust? Any tips?
A: Yes, please do! My favorite butter crust works beautifully. Tip: Roll it slightly thinner than for a full pie (about 1/8 inch) since they bake faster. Chill the dough circles for 10 mins before pressing into the lids for extra flakiness. Handle homemade dough gently—it’s more delicate than refrigerated.

Mason Jar Lid Pies
- Total Time: 45 mins
Description
Get ready for the cutest way to bake up happiness—Mason Jar Lid Pies! These golden, flaky minis wrap up all the comfort of classic pie in a perfectly portioned, palm-sized delight. Whether it’s a picnic, party tray, or just because Tuesday deserves pie, these are charming, delicious, and totally doable. No fancy tools needed—just some jar lids, canned fruit, and a sprinkle of joy. Bonus: they bake faster than full pies and make cleanup a breeze!
Ingredients
-
12 wide-mouth mason jar lids + rings
-
2 (14.5 oz) cans berries in light syrup
-
½ cup granulated sugar
-
3–4 tbsp cornstarch
-
1 (14 oz) box refrigerated pie crusts (2 crusts)
-
1 egg, beaten (or melted butter/cream for brushing)
-
Turbinado sugar (for topping)
Instructions
-
Preheat Oven: 375°F (190°C). Line baking sheet with parchment.
-
Make Filling: Simmer canned berries (with ¾ cup syrup), sugar, and cornstarch for 5–8 mins until thick. Cool 10 mins.
-
Prep Lids: Insert flat lid upside-down in rings. Arrange on baking sheet.
-
Crust Base: Cut dough circles just larger than lid. Press into lids.
-
Fill & Top: Spoon berry mix into each. Cover with dough circle or lattice strips. Crimp edges to seal.
-
Brush & Sprinkle: Brush with egg. Sprinkle turbinado sugar.
-
Bake: 20–25 mins until golden and bubbly. Cool 15–20 mins before removing lids gently.
Notes
Use cool filling and chill crusts slightly before baking to avoid soggy bottoms. Add a scoop of vanilla for extra magic!
- Prep Time: 20 mins
- Cook Time: 25 mins
Nutrition
- Calories: 220 per pie
- Sugar: 15g
- Fat: 9g
- Carbohydrates: 32g
Nutritional Info (Per Mini Pie)
Prep Time: 20 mins | Cook Time: 25 mins | Total Time: 45 mins | Servings: 12
- Calories: ~220 kcal
- Carbohydrates: ~32g
- Fat: ~9g
- Sugars: ~15g
Portable, party-ready & totally charming!
Final Thoughts: More Than Just a Pie
Mason Jar Lid Pies are a celebration of creativity, nostalgia, and the simple pleasure of baking. They remind us that joy doesn’t require perfection—leaky fillings and lopsided crimps add character. Whether you’re honoring Nana’s thrift-shop ingenuity, geeking out over crust chemistry, or globe-trotting with flavors, these mini pies are a canvas for connection. So preheat that oven, embrace the mess, and share the magic—one tiny, buttery bite at a time.


